Purpose: This drill is to improve a player’s glove hand skills and help them get better at catching a baseball.
Set up: You will need to have bean bags or small frisbees for this drill. If you don’t have any at home, click on the pictures below to pick them up. These are both soft, but durable products that are perfect for kids. Both tools force players to pinch their fingers and thumbs together like they will be doing with a baseball glove.
Drill can be done with player and coach or as a partner drill between to players. Players will stand about 15 feet apart, facing each other. They will not have their baseball gloves. Each pair of players will have one bean bag or frisbee.
How it works: The goal of this drill is to train the glove hand and arm to work correctly. The players should not move their feet to get the bag or frisbee, they will only be reaching with their arm and hand. Players will be tossing the bean bags underhand or flipping the frisbee softly, with the goal of giving their partner a toss that is catchable. The receiving player will be in a ready stance with their glove hand (non-dominant hand) up and ready to receive. When the bag or frisbee is tossed, the receiver must only use his glove hand to catch it. They are not allowed to use two hands or their throwing hand (dominant hand).
Progression tip: Once players get good at this drill, make it more difficult. You can make it a competition to see which group can get the most catches in a row. Another competition idea would be to set a time, and see which group can get the highest number of clean catches in the set amount of time.
Through the Wickets Drill
Purpose: This drill is to help young players begin to understand the importance of being quick on their feet, moving to go get ground balls, and getting their body in front of the ball.
Set up: Coach will have a bucket of baseballs and be about 25 feet away from player. Drill can be done inside or outside. If outside, it will work better on infield dirt than it will on grass. Player will be in an athletic stance facing the coach. Player does not need a glove.
How it works: The coach will begin rolling ground balls by hand at a medium speed. He will alternate rolling the balls to the players left and right, forcing the player to move several steps to get to the ball. The player’s goal is to move his body into position so that each ball rolls between his feet and through his legs. The speed should be fast enough to force the player to move quickly, but not too fast for the player to get to. Each ball should roll past the player and out of his way. The coach should not bounce the ball, it must be rolling the entire time. The coach will roll 4-6 ground balls in a row, then give the player a break or rotate to the next player.
Purpose: This drill is to get players comfortable and confident in getting in front and keeping their body squared up to the ball.
Set up: This drill is designed for use with TENNIS BALLS. It must be performed on a surface that allows the ball to bounce. Player will set up about 15 feet away from coach, facing him in a ready position. Player does not need a glove.
How it works: Coach will bounce the tennis balls on a one-hop at the player’s chest height, alternating moving the player left and right. The player’s goal is to use his chest to block each ball and knock them back toward the coach. The coach should bounce each ball far enough away from the player to force him to move quickly, but not too far for the player to get to. The coach should bounce 4-6 ground balls in a row, then give the player a break or rotate to the next player.
Next, the player must develop confidence in his hands so that he can stay down on the
ground ball instead of pulling his body or head up. Here are a couple drills to work on that.
Stationary Fielding Position Drill
Purpose: This drill is to help players learn the proper ground ball fielding position and to work on their hand skills when fielding a ground ball.
Set up: This can be a partner drill or a coach led drill. Partners or player and coach will set up about 10 feet away from each other. Players will be set up in a ground ball fielding position. This can be done with a glove, or it can be a bare handed drill.
How it works: Players and/or coaches will roll ground balls back and forth to each other, while remaining in the fielding position. Players should focus on fielding the ground ball with their hands in the “alligator mouth” position (throwing hand over the top of the glove hand). With their hands together, players will field, bring the ball in toward their body and directly up to their chest. They should be getting the ball up to the position near their chest that they typically throw from. Remaining in the ground ball position, they will immediately roll a ground ball back to their partner or coach. As players get better at this drill, speed it up. Players can try to get the ball into their chest and back to their partner as fast as possible. Coaches working with a player can roll balls in a rapid fire procession, having the player bring each ball to his chest, dump it off to the side, and immediately receive another ground ball.
Purpose: This drill is to improve players infield glove skills.
Set up: Fielder will begin on his knees, with glove out in front of his body but without stiffening out his arms. His fingers should be pointing to ground, glove tip touching ground. Partner or coach will be on knees about 10 feet away.
How it works: The coach or partner will toss the ball softly so that it hops directly in front of the fielder’s glove creating a short hop. Fielder will push his glove through the ball while extending his arm and trying to keep his fingers pointed to the ground as long as possible. While doing so, the player’s eyes and head should stay on the baseball and glove. The player should try to avoid flipping their glove up and curling their wrist. Ideally, their palm will finish facing the sky.
*If your players are having trouble throwing or catching short hops during this drill, you can make it easier by having them use their throwing hand to drop their own short hops right in front of their glove. Another option is having their partner stand close and drop the ball directly in front of them.
Purpose: This is a simple drill to help kids learn how to catch fly balls. It helps them gain confidence catching the ball up high and in front of their body.
Set up: Use a SAFETY BALL for this drill. This can be a partner or coach led drill. Partners or coach and player will start about 15 feet apart facing each other. Players will need their gloves.
How it works: Coach or partner will flip a ball underhand into the air so that it will land close to the player. They should start out by flipping it about 8 to 10 feet in the air, and work up higher as the player begins to gain confidence. Player is trying to get and keep their body underneath the ball and catch the ball up high near their head. The player should freeze after they catch the ball, leaving their glove up where the made the catch for 2 seconds.
Beginner Throwing Drills
Purpose: This drill is designed to help players develop command and control when throwing and/or pitching.
Set up: Have fun with your targets. You can create your own targets with a point system, or simply put a baseball on a tee. Use your best judgment on distance. Set the kids up far enough away that it is a challenge, but close enough that they will be able to hit the targets frequently.
How it works: Simply put, the players will be throwing the ball and trying to hit whatever target you put up. This is a simple drill and concept that can be used often during your practices. Kids love having a target to throw at and it will help them focus on what they are doing. You can make it a competition within the team.
Bonus Fun: Create a relay race. For example, set up 4 tees with plenty of room and set baseballs on them. Break up your team into 4 smaller “teams.” Make sure each team is starting the same distance from the tee. When you say to begin, the first player in each group will throw 3 baseballs at their tee. After they throw they must go get their 3 baseballs and bring them to the next player in line to throw. If they knock the ball off on the first or second throw, they can immediately go get the baseballs, set one back on the tee, and bring the others back to the next player. The team that finishes first wins.
Distance Throw
Purpose: This drill is designed to get young players to gain confidence with throwing the ball hard. Many times they will ease off throwing hard while playing catch, so that they don’t overthrow their partner. This is a great at-home drill for beginners.
Set up: Players need to have their arms fully warmed up. They should have already played catch for 10 to 15 minutes before doing this drill. This can be a competition or done individually.
How it works: Just as the name implies, players will be trying to throw the ball as far as they can. Have them begin on a foul line or set a cone up to mark where they must throw from. A coach or another player will be standing out in the field to act as a marker. The player will throw the ball as far as he can, and when it stops the marker coach will go stand where it landed. Give the player 3 attempts, and leave a cone or other type of marker on his farthest throw. The winner will be the player who’s marker is the farthest from the starting line. If done as an individual drill, have players write down where their farthest throw landed, so that they can try to top their best distance the next time you do the drill.
Purpose: This drill is great for hitters of all ages, but especially for beginners. It helps develop hand-eye coordination, balance, and body and bat control.
Set up: Player will need their bat, at least one baseball (but preferably a bucket full), and plenty of room to swing.
How it works: A fungo style hit is when you throw the ball up to yourself and hit it; just like coaches do when they hit ground balls or fly balls to their players. The player will take the ball in his bottom hand, and have the bat up and ready in his top hand. Make sure the nob (handle end) of the bat is pointed toward where a catcher would squat behind them, and not facing toward where a pitcher would be.
*Note: Young players may have difficulty flipping with their bottom hand because it is usually their non-dominant hand. If they simply cannot execute the flip, let them try with their other hand. In the long run, it’s best to teach them to flip with the bottom hand, because it requires much less movement to get the hand back to the bat.
The player will flip the ball out in front of themselves in an area that they would normally make contact with a pitched ball, and attempt to hit the ball as a line drive up the middle of the field or batting cage.
Bonus Fun: Set up some “holes” and play a round of fungo golf. For example, start at home plate and make the right field foul pole the “hole.” Each player counts how many hits it takes for them to get to the foul pole and hit it. The player who reaches the “hole” with the lowest number of hits, wins.
Target Hitting
Purpose: This drill is great for hitters of all ages. It is designed to help players develop bat control, and understand how to hit balls in different locations of the strike zone.
Set up: Drill is done on a batting tee. You will also need a screen or other object to be used to hang a target. Use some athletic tape to tape an “X” about 5 feet high.
How it works: There are 3 different rounds during this drill: middle pitch, outside pitch, and inside pitch. Coaches will set the tee up for the middle pitch at the middle of the plate. The tee should be slightly out in front of the hitter’s front foot to start, and about even with the foot after he takes his stride. The target will be set up about 15 feet away, right down the middle of the cage or field. Hitters are trying to hit the “X.” The distance and height of the target will cause the players to subconsciously adjust each swing toward hitting line drives.
When setting up the outside pitch, move the screen about 5 feet to the opposite field side of the cage. Tee should be set up on the outside corner of the plate, and moved back slightly, so that the stride foot now lands an inch or two past it.
When setting up the inside pitch, move the screen about 5 feet to the pull field side of the cage. Tee should be set up on the inside corner of the plate, and moved forward slightly, so that the stride foot now lands an inch or two behind it.
Distance Hit
Purpose: This drill is designed to get young players to begin learning how to hit the ball hard. Removing all mechanical thoughts, and focusing on hitting the ball as far as possible is a simple, and natural way for young hitters to learn and develop bat speed and power. This drill is especially great for tee ball age players and for parents working at-home with beginners.
Set up: Players should be nice and loose. Have them take some warm up swings before they begin the drill. This can be a competition or done individually. Set up a batting tee in an area where players can hit the ball as far as they can, without obstacles in the way to stop it.
How it works: Just as the name implies, players will be trying to hit the ball as far as they can. A coach or another player will be standing out in the field to act as a marker. The player will hit the ball as far as he can off of the batting tee. When it stops, the marker coach will go stand where it landed. Give the player 3 attempts, and leave a cone or other type of marker on his farthest throw. The winner will be the player who’s marker is the farthest from the starting line. If done as an individual drill, have players write down where their farthest hit landed, so that they can try to top their best distance the next time you do the drill.
Over-sized Ball Soft Toss
Purpose: This drill is for players who have trouble making contact with the baseball when hitting. The drill will help them develop hand-eye coordination with the bat, as well as develop confidence in their hitting ability.
Set up: All you need is some type of over-sized ball that can be hit. You can use the cheap rubber balls that you can find at department stores, or even a beach ball style ball. If the ball is hard enough that it will hurt to get hit with, you’ll also want an L-screen to stand behind.
How it works: Standing about 12-15 feet away from the hitter, flip the ball underhand to them and let them hit it. The added size of the ball will make contact easier, and help them develop the feel of hitting the ball.
]]>
Balance, rhythm, spatial orientation and the ability to react to both auditory and visual stimulus have all been identified as elements of coordination. In fact, the development of good coordination is a multi-tiered sequence that progress from skills performed with good spatial awareness but without speed, to skills performed at increased speeds and in a constantly changing environment. As Joseph Drabik points out in his book ‘Children & Sports Training’, coordination is best developed between the ages of 7 – 14, with the most crucial period being between 10 – 13 years of age.
As with anything else, an important issue with respect to coordination development is to provide stimulus that is specific (and therefore appropriate) for the individual. Prescribing drills that are either too easy or too difficult for the young athlete will have a less than optimal result.
An interesting note is that there appears to be a cap with respect to coordination development and ability. Younger athletes who learn to master the elements associated with good coordination (balance, rhythm, spatial awareness, reaction etc), are far better off then athletes who are not exposed to this kind of exercise stimulation until advanced ages. The ability to optimally develop coordination ends at around the age of 16. This validates the claim that global, early exposure is the key from an athletic development standpoint. Again, global coordination will serve as the basis to develop specific coordination in the teenage years.
Once again, it is important to mention that coordination development is a process that encompasses years of exposure, and is based on DIVERSITY and VERSATILITY. Young athletes cannot be pigeonholed into sport specific stimulus at a young age and expected to vault into the ranks of elite athletics. As the motto of my company says, ‘You Can’t Become a Champion Until You Become An Athlete.
Furthermore, it is important to understand that coordination-based exercises must be introduced during the preadolescent ages. Adolescence is not an appropriate time during which to begin elements of coordination training. As strength, speed, height and body mass change significantly during these years, it is much more prudent to reinforce already known movements, rather than teach new ones. Herein lies the art and understanding of developing a young athlete. Coaches, trainers and parents must accept the fact that developing a healthy and successful athlete is a journey or process that encompasses several varying degrees of stimulus, all of which build on top of the other.
Coordination training for example, is introduced during the pre-adolescent ages while nervous system plasticity is high (which refers to the nervous systems ability to learn new skills easily) and movement habits have not yet been ingrained as permanent. The scope of coordination training changes during the adolescent ages, during which physical growth alters the young athlete’s previously mastered movement habits. At this time, refinement of movement should take precedent over learning new movement-based skills. In post-adolescence, coordination training can once again be taken to new heights.
One point to consider about coordination is that genetic pre-disposition plays a significant role. Less coordinated children will likely never exhibit the tendencies of naturally coordinated children regardless of training. That is not to say that improvements cannot be made, however – quite the opposite.
Here are three basic principals of coordination training –
1. Start young – coordination improves as a result of learning and mastering new movements. Start young athletes off early with coordination-based exercises that challenge their abilities (within reason). The more coordination a young athlete has, the more ability he or she will display at any perspective sport.
2. Challenge young athletes on an individual and appropriate level – Some youngsters have good balance while others display good rhythm. The key to successful coaching is to undercover what elements of coordination each athlete requires, and develop drills/exercises that most suitably target the weaknesses.
3. Change exercises frequently – young athletes learn quickly in most cases. Be sure to challenge them physically and intellectually with new exercises often.
The following list provides some basic exercises that you can use with your young athletes to help develop elements of coordination –
The other problem that I see with "select teams" is the burnout factor. Most of the "select teams" expect a year around commitment and I have a lot of concern with younger players playing a sport year around. This can be a real issue for younger players both from a burnout standpoint and from an injury standpoint. I have seen many players who by the time they get to high school now have injuries to shoulders and knees and I believe a lot of it stems from over use from playing year around or by the time they get to high school they just don't want to play anymore.
Managing playing time requires planning and coordination and practice. Whatever your playing time policy is whether its each player plays half the game or equal playing time for all players or whatever it is, each of you needs to set and abide by that policy and stick with it win or lose. As the head coach you must plan the way you are going to accomplish the minimum playing goals that you set.
The first step in this process is to determine who your starters are. Try to figure out how to put a competitive starting unit on the field or floor while maximizing the number of stronger players. You will have to learn to mix and match your stronger players with your weaker ones so that you always have some balance on the floor. The fact is that you will always have some players that will play a littlie more than others and you just have to try and balance it out. You also don't want to get into a situation where you become overly dependent on a few kids as the rest of the team won't develop and they also will start to depend on those kids. That's not fair to either those few players or the rest of your team. Make sure that you sit your better players a least a portion of the game so that your other players can learn to play without them. Practice your substitutions regularly in practice. If you have assistant coaches assign them the responsibility of subbing at particular positions. Make sure the players know who they are going in for and have the subbing player yell out the players name he is replacing. Before the game and during practice spend 5 minutes just sending kids in and out, with your assistant coaches monitoring all of the substitutions. Get good at it, it's something few coaches spend time working on and it can make a big difference in the outcome of your game.
Playing time isn't just about the amount of playing time a player gets but the opportunities a player gets. So the second part of this equation is getting players opportunities to maximize their confidence in their abilities. Now with that said, life is not fair and kids need to learn that too. Sometimes a kid will need to play a certain position as it is for the good of the team. Part of what you are teaching is "teamwork" after all. For example one of my soccer teams was always very competitive, I made sure that everyone got a lot of playing time and I would move kids around to different positions once they became skilled at the position they played most. I didn't move all of them around a lot as some kids had a natural understanding of the game and some kids were completely lost. So if I moved everyone around all of the time no one would have learned how to play their position.
I had some kids that never wanted to move they enjoyed the position they played and I had some kids who always wanted to play forward as they wanted to score and to be honest some of the ones who wanted to play certain position just didn't have the skills to play those positions. So I had to have a game plan to accomplish that. So in this case I would have two substitution charts. One for if the game was close and one for if we were getting blown away or blowing away the other team. If the game was tight, the players would sub into the position that would best benefit the team. If the game was a blowout the players would sub into positions that they wanted to have more opportunities to play. Believe me when I say that this approach still did not make everyone happy. I still had a few parents that were not happy my philosophy. But I never waived. In fact I had a parent come across the field during a playoff game that we were winning and tell me that if I didn't put their son at forward during the last quarter they were not going to show up for the next game. It was a tight game and the player in question happened to be one of my best defenders. In fact the kid enjoyed defense and took pride in playing it. He was tough as nails and never backed down. Their thought was that he was better than one of the players that I was playing at forward and the fact was that he was. But I couldn't play the other player at defense because that player just wasn't strong enough and in order to get everyone equal playing time I need to keep that player at forward. So I kept him at defense and we won the game. They did show up the next day because it was the championship game. I never took it out on the kid because it wasn't his fault. We lost the championship game that year and they didn't return the following year, but the year after that they returned and asked if they could again join the team.
Bottom line, have a plan, stick with your plan win or lose. Communicate your plan to your players and their parents. Practice Practice Practice.
]]>
There are many advantages to using a wiffle ball for youth player batting practice. The main advantage is control of the baseball when pitching it in to the player. Batting tees are great to improve swinging mechanics, but pitching the ball into a player’s strike zone teaches him to follow the ball as it approaches. Eye contact when batting is critical for power and ball control when swinging.
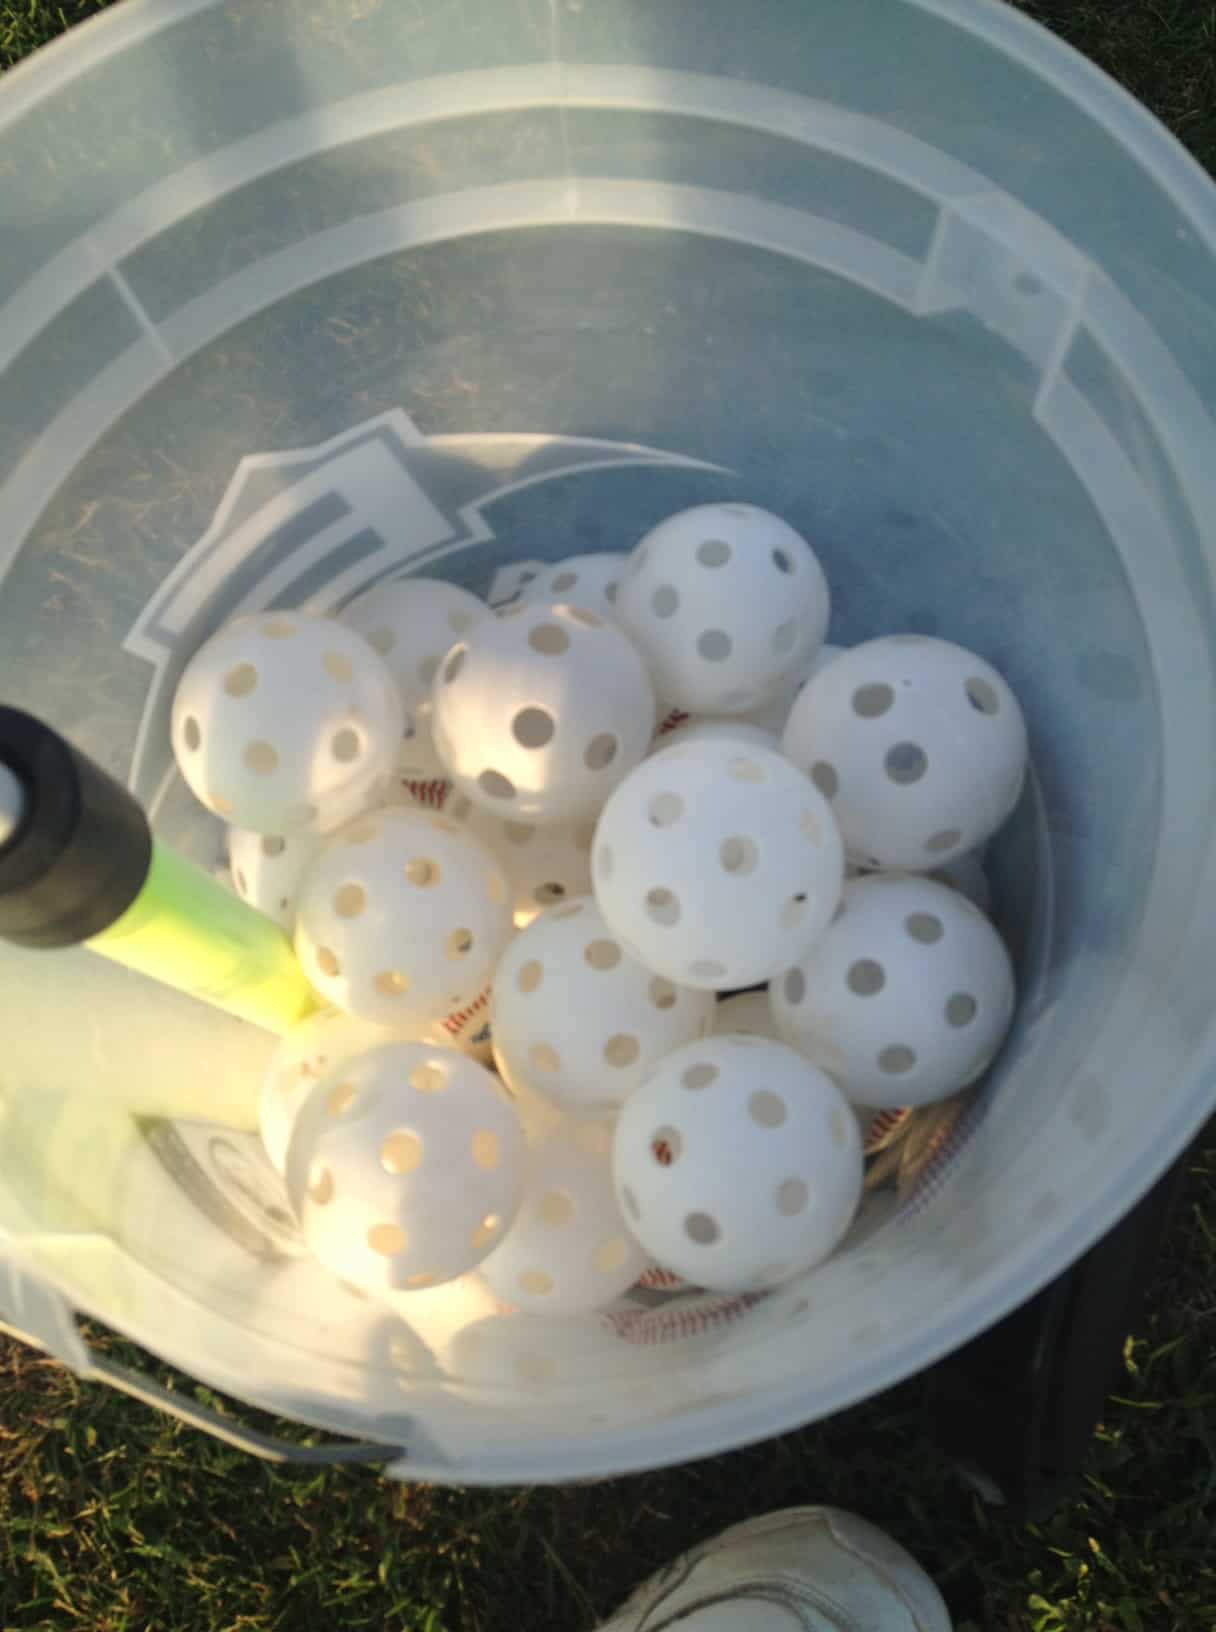
The drills listed here can be done sequentially in the order presented so coaches can plan their practices in this order. Wiffle balls are inexpensive and come in a golf ball size as well as the official 9 inch diameter ball. They also come in different weights. A dozen golf ball size balls is less than $3.00, and are useful for accurate zone pitching and for hitting the ball farther.
A Note to Coaches for Throwing Wiffle Balls during Drills
This drill helps hitters improve their inside swing. It is highly recommended that for this and the two drills that follow, coaches use the golf ball sized wiffle balls.
This drill is easy on the coaches’ arm. He is situated about 15 to 20 feet away from the batter, and he is kneeling on one leg and throwing underhanded to the batter’s box.
Take a bucket of about 2 dozen small wiffle balls and set down about 15 feet away between home plate and the batter’s box. The player comes to bat using either a BBCOR or wood bat, if they are available (preferred over aluminum bats because of the lightness of the wiffle ball).
The coach aims his pitch to the hitter. He tells the batter he is going to throw inside pitches. The coach watches the hitter’s stride and swing to make sure his body is striding and swinging in a fluid motion.
When the player swings, bend your head down to avoid getting hit. It’s a great idea for coaches to wear batting helmets for this drill. Although the wiffle ball is harmless, it can still sting if the angle of the ball is just right.
What’s great about wiffle balls is that strikes can be thrown every time. There is nothing better to improve a hitter’s technique than hitting balls thrown accurately on the inside, middle and outside of the plate.
Throw about 5 balls in a row on the inside of the plate, followed by 5 pitches on the outside of the plate, and finally 5 throws down the middle. Encourage the batter to swing only when he thinks the ball is good to hit.
If you have other coaches or parents to help you with this drill, you can set up three stations with three or four players at each station. Pitching 15 balls to each batter takes less than two minutes, so players don’t spend a lot of time waiting for their turn.
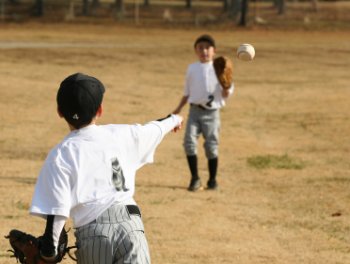
The wiffle ball Hitting and Fielding Drill is a more fast paced drill. In this drill, two batters will be hitting in tandem and will involve fielders who will retrieve the balls that are hit.
Like the previous drill stations can be set up. Each station will have one coach, two batters and two fielders. Kids love this drill because it tests their reflexes. The fielders must always be in alert mode because balls will be hit to them literally seconds apart from each other.
A baseball field is not required for this drill. However, if you do have access to a field, you can set up either at home plate or in the outfield, where fielders will have to retrieve fly balls that are hit to them.
You can have three stations, each copying this exact setup. Coaches also test the batters, throwing inside and outside pitches, high and low in the strike zone. The fast paced nature of the drill keeps batters on their toes as well as fielders.
A batter is allowed to let bad pitches go past him, and is encouraged only to swing at pitches in the strike zone. The more wiffle balls coaches have at the ready, the longer the momentum will last.
For this drill, coaches will have hitters use a lighter and thinner bat. These are available at most sporting goods retailers. Here is the link for the Skilz Quick Stick bat. (Best Price on Amazon)
This is a one on one drill. Using assistant coaches and/or parents is a great idea, so the whole team can get involved.
Coaches should encourage parents to do this wiffle ball Rhythm Drill at home.
Coaches stand in front of the player at a 45 degree angle from the hitter.
Using a wiffle ball makes the drill more challenging than a regular baseball because of the faster speed of the approaching wiffle ball. The drill can be used for youth players as well as more experienced hitters.
This drill helps build forearm and wrist strength in hitters. The player can stand anywhere on the field.
The coach is looking for quick reflexes in the hitter. The bat should “snap”, and the movement of the heavier bat should be initiated at the forearms and the wrists.
There are several ways to make a bat heavier. Many people have drilled a hole in the knob of the bat and then pour sand in the hole. Another, easier way is to wrap a good amount of duct tape or gorilla tape around the bat’s barrel.
In the drill, the batter olds the bat out in front of his body. Next, the barrel of the bat goes to the top of his head. This is accomplished by the hitter bending his wrists. Immediately after this, the batter “snaps” the bat back into his starting position.
Once the movement is sharp and crisp, lob 10 wiffle balls for the batter to try and hit, using his forearms and wrists. Because of the strain on the wrists, the hitter shouldn’t try more than 10 repetitions at a time.
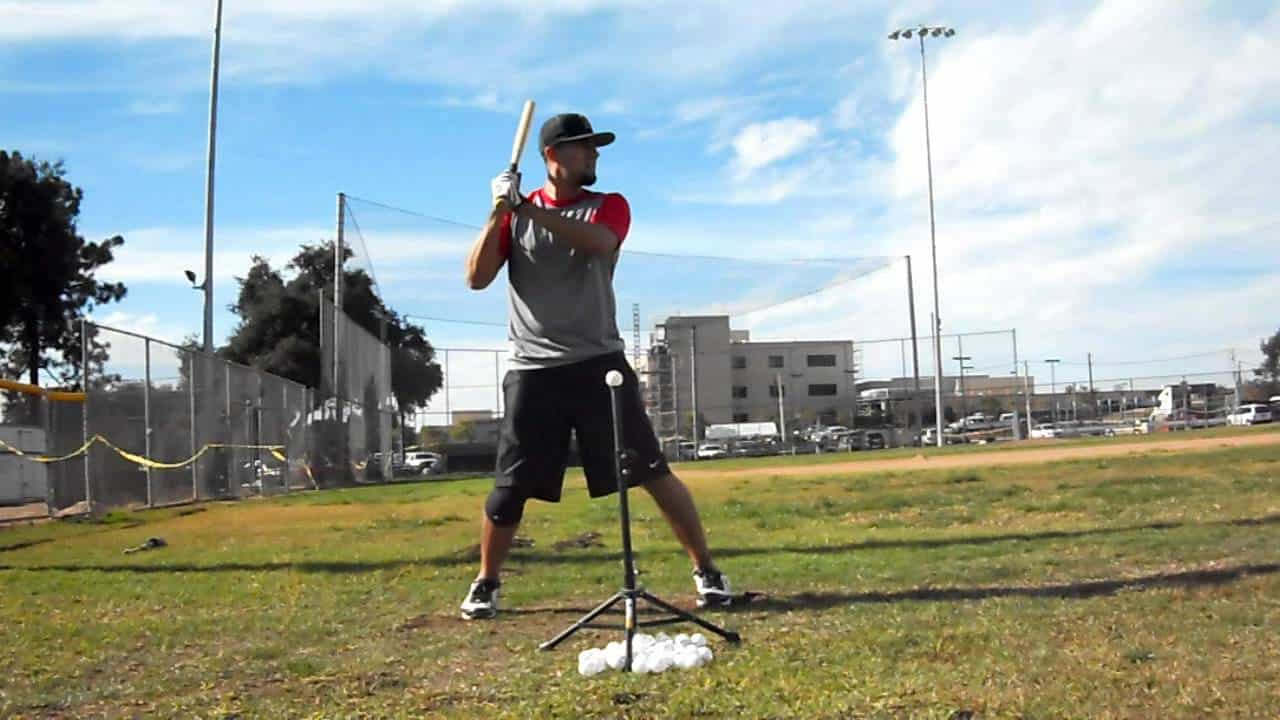
Tee ball hitting is an excellent way for baseball players at all levels of expertise to correct and perfect their body mechanics.
There are three basic elements to hitting a baseball properly.
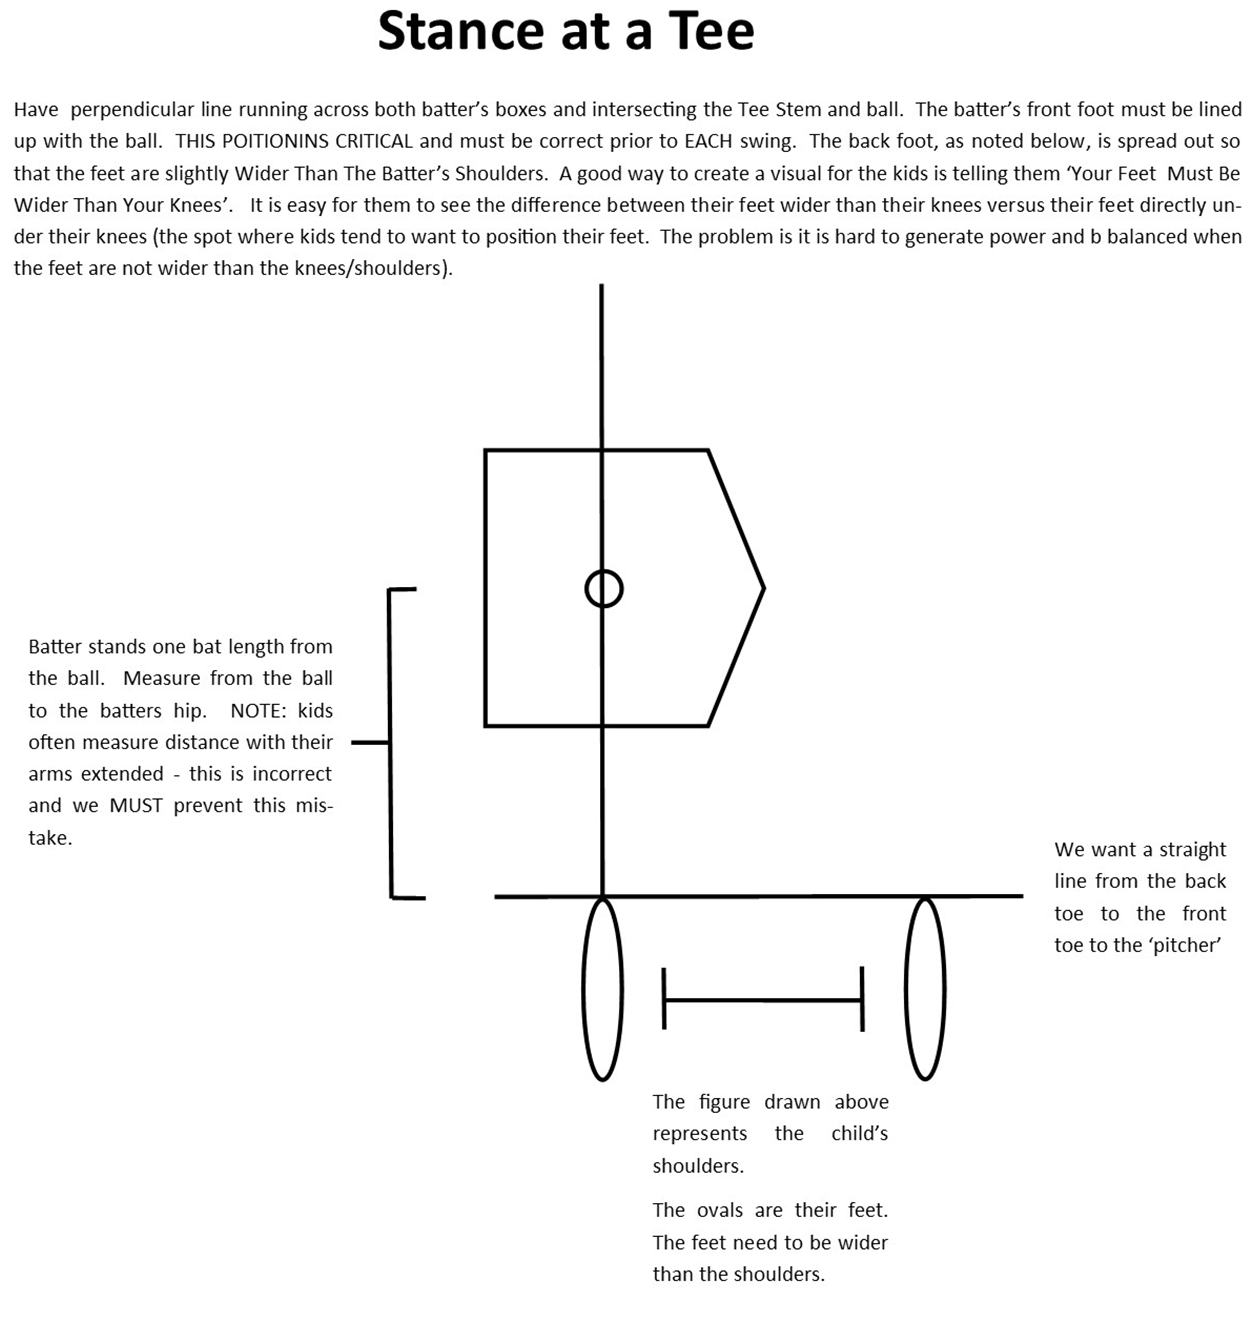
In this drill, coaches place the batting tee at thigh high level in the center of home plate. The player takes 5 swings.
Next, the coach moves the tee in closer to the hitter to simulate an inside pitch. The player takes 5 more swings.
Now the coach moves the tee to the outside of home plate. The hitter takes 5 swings at the outside pitch.
This drill moves to the next level, where the batting tee is next moved waist high. The player does 5 swings down the middle, followed by inside and outside pitches, 5 each.
This drill mostly focuses on eye contact, yet his swinging mechanics (stance, stride and swing), should be at its most perfected level. When body mechanics are in place, the hitter can focus on his eye contact.
Have the hitter look in the direction of the pitcher’s mound when he takes his swings. He should visualize the pitcher throwing the ball to him as he hits it off the tee. He should imagine that the pitcher is winding up, then releasing the ball to him. He should thus delay his swing by about two seconds as he imagines the ball coming toward him. He finally swings at the wiffle ball on the tee.
Wiffle balls used on the batting tee will move in unusual directions when hit. The batter thus has less control of where the ball will go when he hits it. He can improve the direction of the wiffle ball through repetition. Batting tees, combined with a net will allow players to put in long practices at home. They can have a partner adjust the batting tee so they can practice inside and outside pitches, as well as pitches high and low in the strike zone.
This drill also involves a batting tee. Players should use underweight bats for this drill.
Using a wiffle ball challenges young players to place a bunt where they want it to land with a lighter, plastic ball. Because it is a wiffle ball, they will often need to overcompensate in order to improve their bunting accuracy.
Coaches place a wiffle ball on the batting tee. Next, he instructs hitter to bunt the ball, first down the third base line. The player has five tries.
Following this, the player is instructed to bunt the wiffle ball down the first base line, having five tries.
Lastly, the coach instructs the hitter to place the wiffle ball at a specific spot in the infield, either on the third base side or the first base side. He has five tries at this for a total of 15 attempts to bunt the wiffle ball.
The next player comes up. The coach places the wiffle ball on the tee and repeats.
It’s a great idea to have three stations, each with 3 or 4 players at the batting tee. Using assistant coaches or even parents will make the drill move quickly.
]]>There is good news. Parents who deal with these issues and concerns efficiently will enjoy their child’s career, as they guide them to be “all that they can be.” The answers are out there if they are willing to read many of the current studies and books about how better to deal with the modern athlete.
There are many questions and issues to deal with for parents. What should they do when their child cries? How can they be more encouraging without pushing their kids? How can sports be more fun for their kids? What should parents say to their kids after a tough game? How do they prevent burnout in athletes? Should a child play travel ball? What makes a good sports parent? Most importantly, how do parents inspire young athletes?
Each child and situation is different so often a trial and error process is necessary. Following are some of the best athlete parenting tips to help kids enjoy the games and mature into responsible teenagers and high school athletes and people.
* Always keep in mind the age of the players.
* Ensure the physical and emotional health of the child is a top priority.
* Realize that sports are only games and one aspect of many aspects of a child’s life, and not the most important one.
* Always remember that it is the player’s, not the parents’ career.
* Stay positive and try something helpful. Having the player perform some fundamental drills at home can give immediate results. Look up some practice moves in books, videos, or online to provide the player with some constructive things to work on. Ask the player’s coach to give a few drills to h
Focus on the effort level of the players after games, not on the result.
These are also great drills for moms and dads to work with their kids at home. They’re SIMPLE and FUN, and your player will enjoy working on them with you.
Purpose: This drill is to improve a player’s glove hand skills and help them get better at catching a baseball.
Set up: You will need to have bean bags or small frisbees for this drill. If you don’t have any at home, click on the pictures below to pick them up. These are both soft, but durable products that are perfect for kids. Both tools force players to pinch their fingers and thumbs together like they will be doing with a baseball glove.
Drill can be done with player and coach or as a partner drill between to players. Players will stand about 15 feet apart, facing each other. They will not have their baseball gloves. Each pair of players will have one bean bag or frisbee.
How it works: The goal of this drill is to train the glove hand and arm to work correctly. The players should not move their feet to get the bag or frisbee, they will only be reaching with their arm and hand. Players will be tossing the bean bags underhand or flipping the frisbee softly, with the goal of giving their partner a toss that is catchable. The receiving player will be in a ready stance with their glove hand (non-dominant hand) up and ready to receive. When the bag or frisbee is tossed, the receiver must only use his glove hand to catch it. They are not allowed to use two hands or their throwing hand (dominant hand).
Progression tip: Once players get good at this drill, make it more difficult. You can make it a competition to see which group can get the most catches in a row. Another competition idea would be to set a time, and see which group can get the highest number of clean catches in the set amount of time.
Through the Wickets Drill
Purpose: This drill is to help young players begin to understand the importance of being quick on their feet, moving to go get ground balls, and getting their body in front of the ball.
Set up: Coach will have a bucket of baseballs and be about 25 feet away from player. Drill can be done inside or outside. If outside, it will work better on infield dirt than it will on grass. Player will be in an athletic stance facing the coach. Player does not need a glove.
How it works: The coach will begin rolling ground balls by hand at a medium speed. He will alternate rolling the balls to the players left and right, forcing the player to move several steps to get to the ball. The player’s goal is to move his body into position so that each ball rolls between his feet and through his legs. The speed should be fast enough to force the player to move quickly, but not too fast for the player to get to. Each ball should roll past the player and out of his way. The coach should not bounce the ball, it must be rolling the entire time. The coach will roll 4-6 ground balls in a row, then give the player a break or rotate to the next player.
Goalie Drill
Purpose: This drill is to get players comfortable and confident in getting in front and keeping their body squared up to the ball.
Set up: This drill is designed for use with TENNIS BALLS. It must be performed on a surface that allows the ball to bounce. Player will set up about 15 feet away from coach, facing him in a ready position. Player does not need a glove.
How it works: Coach will bounce the tennis balls on a one-hop at the player’s chest height, alternating moving the player left and right. The player’s goal is to use his chest to block each ball and knock them back toward the coach. The coach should bounce each ball far enough away from the player to force him to move quickly, but not too far for the player to get to. The coach should bounce 4-6 ground balls in a row, then give the player a break or rotate to the next player.
Next, the player must develop confidence in his hands so that he can stay down on the
ground ball instead of pulling his body or head up. Here are a couple drills to work on that.
Stationary Fielding Position Drill
Purpose: This drill is to help players learn the proper ground ball fielding position and to work on their hand skills when fielding a ground ball.
Set up: This can be a partner drill or a coach led drill. Partners or player and coach will set up about 10 feet away from each other. Players will be set up in a ground ball fielding position. This can be done with a glove, or it can be a bare handed drill.
How it works: Players and/or coaches will roll ground balls back and forth to each other, while remaining in the fielding position. Players should focus on fielding the ground ball with their hands in the “alligator mouth” position (throwing hand over the top of the glove hand). With their hands together, players will field, bring the ball in toward their body and directly up to their chest. They should be getting the ball up to the position near their chest that they typically throw from. Remaining in the ground ball position, they will immediately roll a ground ball back to their partner or coach. As players get better at this drill, speed it up. Players can try to get the ball into their chest and back to their partner as fast as possible. Coaches working with a player can roll balls in a rapid fire procession, having the player bring each ball to his chest, dump it off to the side, and immediately receive another ground ball.
Short Hop Drills
Purpose: This drill is to improve players infield glove skills.
Set up: Fielder will begin on his knees, with glove out in front of his body but without stiffening out his arms. His fingers should be pointing to ground, glove tip touching ground. Partner or coach will be on knees about 10 feet away.
How it works: The coach or partner will toss the ball softly so that it hops directly in front of the fielder’s glove creating a short hop. Fielder will push his glove through the ball while extending his arm and trying to keep his fingers pointed to the ground as long as possible. While doing so, the player’s eyes and head should stay on the baseball and glove. The player should try to avoid flipping their glove up and curling their wrist. Ideally, their palm will finish facing the sky.
*If your players are having trouble throwing or catching short hops during this drill, you can make it easier by having them use their throwing hand to drop their own short hops right in front of their glove. Another option is having their partner stand close and drop the ball directly in front of them.
Purpose: This is a simple drill to help kids learn how to catch fly balls. It helps them gain confidence catching the ball up high and in front of their body.
Set up: Use a SAFETY BALL for this drill. This can be a partner or coach led drill. Partners or coach and player will start about 15 feet apart facing each other. Players will need their gloves.
How it works: Coach or partner will flip a ball underhand into the air so that it will land close to the player. They should start out by flipping it about 8 to 10 feet in the air, and work up higher as the player begins to gain confidence. Player is trying to get and keep their body underneath the ball and catch the ball up high near their head. The player should freeze after they catch the ball, leaving their glove up where the made the catch for 2 seconds.
Purpose: This drill is designed to help players develop command and control when throwing and/or pitching.
Set up: Have fun with your targets. You can create your own targets with a point system, or simply put a baseball on a tee. Use your best judgment on distance. Set the kids up far enough away that it is a challenge, but close enough that they will be able to hit the targets frequently.
How it works: Simply put, the players will be throwing the ball and trying to hit whatever target you put up. This is a simple drill and concept that can be used often during your practices. Kids love having a target to throw at and it will help them focus on what they are doing. You can make it a competition within the team.
Bonus Fun: Create a relay race. For example, set up 4 tees with plenty of room and set baseballs on them. Break up your team into 4 smaller “teams.” Make sure each team is starting the same distance from the tee. When you say to begin, the first player in each group will throw 3 baseballs at their tee. After they throw they must go get their 3 baseballs and bring them to the next player in line to throw. If they knock the ball off on the first or second throw, they can immediately go get the baseballs, set one back on the tee, and bring the others back to the next player. The team that finishes first wins.
Distance Throw
Purpose: This drill is designed to get young players to gain confidence with throwing the ball hard. Many times they will ease off throwing hard while playing catch, so that they don’t overthrow their partner. This is a great at-home drill for beginners.
Set up: Players need to have their arms fully warmed up. They should have already played catch for 10 to 15 minutes before doing this drill. This can be a competition or done individually.
How it works: Just as the name implies, players will be trying to throw the ball as far as they can. Have them begin on a foul line or set a cone up to mark where they must throw from. A coach or another player will be standing out in the field to act as a marker. The player will throw the ball as far as he can, and when it stops the marker coach will go stand where it landed. Give the player 3 attempts, and leave a cone or other type of marker on his farthest throw. The winner will be the player who’s marker is the farthest from the starting line. If done as an individual drill, have players write down where their farthest throw landed, so that they can try to top their best distance the next time you do the drill.
Purpose: This drill is great for hitters of all ages, but especially for beginners. It helps develop hand-eye coordination, balance, and body and bat control.
Set up: Player will need their bat, at least one baseball (but preferably a bucket full), and plenty of room to swing.
How it works: A fungo style hit is when you throw the ball up to yourself and hit it; just like coaches do when they hit ground balls or fly balls to their players. The player will take the ball in his bottom hand, and have the bat up and ready in his top hand. Make sure the nob (handle end) of the bat is pointed toward where a catcher would squat behind them, and not facing toward where a pitcher would be.
*Note: Young players may have difficulty flipping with their bottom hand because it is usually their non-dominant hand. If they simply cannot execute the flip, let them try with their other hand. In the long run, it’s best to teach them to flip with the bottom hand, because it requires much less movement to get the hand back to the bat.
The player will flip the ball out in front of themselves in an area that they would normally make contact with a pitched ball, and attempt to hit the ball as a line drive up the middle of the field or batting cage.
Bonus Fun: Set up some “holes” and play a round of fungo golf. For example, start at home plate and make the right field foul pole the “hole.” Each player counts how many hits it takes for them to get to the foul pole and hit it. The player who reaches the “hole” with the lowest number of hits, wins.
Purpose: This drill is great for hitters of all ages. It is designed to help players develop bat control, and understand how to hit balls in different locations of the strike zone.
Set up: Drill is done on a batting tee. You will also need a screen or other object to be used to hang a target. Use some athletic tape to tape an “X” about 5 feet high.
How it works: There are 3 different rounds during this drill: middle pitch, outside pitch, and inside pitch. Coaches will set the tee up for the middle pitch at the middle of the plate. The tee should be slightly out in front of the hitter’s front foot to start, and about even with the foot after he takes his stride. The target will be set up about 15 feet away, right down the middle of the cage or field. Hitters are trying to hit the “X.” The distance and height of the target will cause the players to subconsciously adjust each swing toward hitting line drives.
When setting up the outside pitch, move the screen about 5 feet to the opposite field side of the cage. Tee should be set up on the outside corner of the plate, and moved back slightly, so that the stride foot now lands an inch or two past it.
When setting up the inside pitch, move the screen about 5 feet to the pull field side of the cage. Tee should be set up on the inside corner of the plate, and moved forward slightly, so that the stride foot now lands an inch or two behind it.
Purpose: This drill is designed to get young players to begin learning how to hit the ball hard. Removing all mechanical thoughts, and focusing on hitting the ball as far as possible is a simple, and natural way for young hitters to learn and develop bat speed and power. This drill is especially great for tee ball age players and for parents working at-home with beginners.
Set up: Players should be nice and loose. Have them take some warm up swings before they begin the drill. This can be a competition or done individually. Set up a batting tee in an area where players can hit the ball as far as they can, without obstacles in the way to stop it.
How it works: Just as the name implies, players will be trying to hit the ball as far as they can. A coach or another player will be standing out in the field to act as a marker. The player will hit the ball as far as he can off of the batting tee. When it stops, the marker coach will go stand where it landed. Give the player 3 attempts, and leave a cone or other type of marker on his farthest throw. The winner will be the player who’s marker is the farthest from the starting line. If done as an individual drill, have players write down where their farthest hit landed, so that they can try to top their best distance the next time you do the drill.
Purpose: This drill is for players who have trouble making contact with the baseball when hitting. The drill will help them develop hand-eye coordination with the bat, as well as develop confidence in their hitting ability.
Set up: All you need is some type of over-sized ball that can be hit. You can use the cheap rubber balls that you can find at department stores, or even a beach ball style ball. If the ball is hard enough that it will hurt to get hit with, you’ll also want an L-screen to stand behind.
How it works: Standing about 12-15 feet away from the hitter, flip the ball underhand to them and let them hit it. The added size of the ball will make contact easier, and help them develop the feel of hitting the ball.
]]>
The more players can throw to other players the quicker they will be ready for game day.
Drill Set Up: Team players with similar talent with each other. Have the players start at distances which they can be successful. 10 feet away is a good starting point.
The Drill:
Coaching Tip: Tennis balls work well when starting
Game: Have each pair count the number of successful catches and throws. The team with the most catches or most catches in a row is the winner.
]]>This is a trap, one that I fell into as a young player also. I worked on one in practice and remember having a decent one, but didn’t throw it often in games for the reason stated above. After I graduated HS, and moved on in Baseball, it became very apparent that my fastball wasn’t over powering anymore! So began the process of trying to find a change up that was comfortable in my hand, I could command and I had confidence in to throw in any count. This proved to not be an easy task as it took roughly 6-7 years to finally perfect it.
Fast forward to now, all young pitchers I work with, 9 years old to college, Change-Up Development is a part of each session and practice. Some make quick strides while others take a little longer. In season sessions always start with discussion about how their last game went. We discuss command, how they did with first pitch strikes, how many Change-Ups they threw with confidence and command, among other things. Most of the answers I get are either “None” or “A few.” When I ask why so few, the answers are usually either “They weren’t on my Fastball” or “I was behind in the count too much.”
Like I said, I fell into this same trap as a youth and found it difficult to overcome later in my baseball career. Now the question is, “How do we throw more in a game?” Communication and a belief in and commitment to development. The player and parents need to relay this message to their coach. The goal is to throw 2-3 maybe even 4 Change-Ups per inning (assuming they throw 15 pitches an inning). Pick pre determined counts that they will throw them in. Maybe an 0-0 count second time through the line up. Maybe you decide that each time, in a certain inning, they will throw a Change-Up every time they throw a strike with the first pitch. Maybe every time they get into a 1-1 count they throw a Change-Up. There are many options you can choose but the point is, there needs to be a plan. If you just say before the game starts that you want them to throw 10 change ups in a game, but lack a plan for how to make those 10 happen, the odds are that when that game is over, they will have not accomplished that goal.
Developing a Change-Up should be a high priority for all youth pitchers who have goals of playing beyond youth baseball. I know we are out there pitching to help our team win but we also need to keep in mind what our long term goals are. In a perfect world, the player, parents and coaches are all on the same page with this and work together to help our Dudes prepare for their future,
]]>Purpose: Working on bat control and hitting the ball where it’s pitched.
Drill Set-Up: The field will need to be set up for batting practice with a screen protecting the BP pitcher. Place cones halfway between first and second base, as well as between second and third base. You will need a bucket of baseballs for the pitcher.
The Drill: Each batter will get twelve pitches in this drill. The first four should be hit to the right field side of the cone between first and second. The next four should be hit up the middle between the two cones. The last four swings should be hit down the left field line. The BP pitcher should be trying to help the batter by throwing pitches that can be hit in the proper direction.
Make it a Game: To make this a competitive drill, have a coach keeping score for each batter. Give one point for a ground ball hit in the proper direction, and two points for a line drive. No points are scored for pop-ups/fly balls, even if they are in the correct direction. The player with the most points after a set number of rounds is the winner.
]]>At all levels of play, the closer the catcher can receive a pitch in relationship to the batter, and the strike zone, the better chance those pitches are called strikes.
Note: The Strike Zone is defined as the space over home plate, which is between the batter’s armpits and the top of the knees. The strike zone, in relation to home plate, remains the same regardless of where in the batter’s box the batter stands.
We want the umpire as close to the strike zone as possible. Quality pitches caught closer to the strike zone have an increased chance of being called strikes.
When the catcher sets up too deep, the pitcher is forced to throw each pitch further than necessary. A catcher positioned 2’-4’ closer to the pitcher makes a huge difference from the pitcher’s perspective, visually. The closer the catcher is to the pitcher, the more confident the pitcher is going to feel on each pitch.
Older pitchers can deliver off-speed pitches (which travel on more of a downward plane) with less concern of the ball bouncing in front of the catcher (giving base runners the opportunity to advance). A significant factor in executing an off-speed pitch is throwing it with maximum confidence.
Additionally, when the catcher is too far behind the batter, a pitcher is forced to throw off-speed pitches on a higher plane, so the ball reaches the catcher. Pitches that are higher in the zone, especially off-speed pitches, are easier for the batter to hit …and hit further.
All pitches travel on a downward angle to the catcher. The shorter the distance between the pitcher and catcher, the fewer balls in the dirt; we reduce the number of past balls and wild pitches.
The shorter distance a pitcher is required to throw the ball, the less stress on the arm. A few extra feet per pitch, on a 50-60+ pitch outing, adds up to considerable unnecessary stress on a pitcher’s arm. The same goes for the catcher throwing the ball back to the pitcher(s) over the course of a full game.
The role of the catcher extends far beyond receiving pitches. The catcher is an integral part of the team defensive unit; required to make throws to bases on bunted balls and balls tapped in front of home plate; when runners attempt to advance via a steal and on blocked pitches in the dirt.
The closer the catcher is to the field of play the quicker they can field balls, and they are closer to the bases when making throws. Shorter throws are more accurate; getting to the ball quicker and throwing a shorter distance can make the difference between an out or safe call on bang-bang plays.
The catcher is the leader of the defense. When not receiving pitches, we want the catcher in their ‘defensive position’, which is in front of home plate. It is from this point they communicate with the defense and run the game. Developing the habit in our catchers of getting to their ‘defensive position’ the moment the ball is put into play usually requires a lot of reminding from a coach. The closer the catcher sits to home plate, the quicker they will develop this important habit.
In addition to leading the team, it is critical for the catcher to be in their ‘defensive position’ when making plays on runners attempting to score.
At all levels of play, given the unique nature of this position, the catcher often gets lost in the shuffle of the many aspects of the game needed to be taught during practices. Yes, I saw it at the highest levels of NCAA Division-I and as a professional player.
We want to make a conscious commitment to ourselves, prior to the start of pre-season practices, to work with our catchers each day. It begins with the simple step of adding “Catcher’s Work” to our Practice Planning.
]]>By building a foundation on these principles, every player on your team can have the perfect swing. The earlier you start these essentials the better. Most parents start their kids with batting drills in tee ball. But other wait until they get a little older and start playing coach pitch baseball.
]]>My philosophy has always been that the kids I coach get a lot of playing time. Although all of my kids played some "select sports", in general I think that the philosophy is screwed up because it usually becomes more about recruiting than developing players. Kids come and go because the coach doesn't play them enough or the parents think there child should be on a better team but to me the focus always seams to move from development to winning. Now the flip side of that is that in pure recreational teams you have a difficult time with player and parent commitment and the skill levels can be way below some of your better players. So it can be a very difficult thing to find a happy medium. In fact that is probably why players and parents move to "select leagues" as there children's skill level or the whole teams skill level has outgrown the league skill level and it starts to be a waste of time as you end up blowing out all of the teams you play or the individual athlete just isn't being challenged.
The other problem that I see with "select teams" is the burnout factor. Most of the "select teams" expect a year around commitment and I have a lot of concern with younger players playing a sport year around. This can be a real issue for younger players both from a burnout standpoint and from an injury standpoint. I have seen many players who by the time they get to high school now have injuries to shoulders and knees and I believe a lot of it stems from over use from playing year around or by the time they get to high school they just don't want to play anymore.
Managing playing time requires planning and coordination and practice. Whatever your playing time policy is whether its each player plays half the game or equal playing time for all players or whatever it is, each of you needs to set and abide by that policy and stick with it win or lose. As the head coach you must plan the way you are going to accomplish the minimum playing goals that you set.
The first step in this process is to determine who your starters are. Try to figure out how to put a competitive starting unit on the field or floor while maximizing the number of stronger players. You will have to learn to mix and match your stronger players with your weaker ones so that you always have some balance on the floor. The fact is that you will always have some players that will play a little more than others and you just have to try and balance it out. You also don't want to get into a situation where you become overly dependent on a few kids as the rest of the team won't develop and they also will start to depend on those kids. That's not fair to either those few players or the rest of your team. Make sure that you sit your better players a least a portion of the game so that your other players can learn to play without them. Practice your substitutions regularly in practice. If you have assistant coaches assign them the responsibility of subbing at particular positions. Make sure the players know who they are going in for and have the subbing player yell out the players name he is replacing. Before the game and during practice spend 5 minutes just sending kids in and out, with your assistant coaches monitoring all of the substitutions. Get good at it, it's something few coaches spend time working on and it can make a big difference in the outcome of your game.
Playing time isn't just about the amount of playing time a player gets but the opportunities a player gets. So the second part of this equation is getting players opportunities to maximize their confidence in their abilities. Now with that said, life is not fair and kids need to learn that too. Sometimes a kid will need to play a certain position as it is for the good of the team. Part of what you are teaching is "teamwork" after all. For example one of my soccer teams was always very competitive, I made sure that everyone got a lot of playing time and I would move kids around to different positions once they became skilled at the position they played most. I didn't move all of them around alot as some kids had a natural understanding of the game and some kids were completely lost. So if I moved everyone around all of the time no one would have learned how to play their position.
I had some kids that never wanted to move they enjoyed the position they played and I had some kids who always wanted to play forward as they wanted to score and to be honest some of the ones who wanted to play certain position just didn't have the skills to play those positions. So I had to have a game plan to accomplish that. So in this case I would have two substitution charts. One for if the game was close and one for if we were getting blown away or blowing away the other team. If the game was tight, the players would sub into the position that would best benefit the team. If the game was a blowout the players would sub into positions that they wanted to have more opportunities to play. Believe me when I say that this approach still did not make everyone happy. I still had a few parents that were not happy my philosophy. But I never waived. In fact I had a parent come across the field during a playoff game that we were winning and tell me that if I didn't put their son at forward during the last quarter they were not going to show up for the next game. It was a tight game and the player in question happened to be one of my best defenders. In fact the kid enjoyed defense and took pride in playing it. He was tough as nails and never backed down. Their thought was that he was better than one of the players that I was playing at forward and the fact was that he was. But I couldn't play the other player at defense because that player just wasn't strong enough and in order to get everyone equal playing time I need to keep that player at forward. So I kept him at defense and we won the game. They did show up the next day because it was the championship game. I never took it out on the kid because it wasn't his fault. We lost the championship game that year and they didn't return the following year, but the year after that they returned and asked if they could again join the team.
Bottom line, have a plan, stick with your plan win or lose. Communicate your plan to your players and their parents. Practice Practice Practice.
]]>It doesn’t take a rocket scientist to realize learning One wind-up at a time would be easier than learning two simultaneously. When I say learn, I’m not only including the brain’s memory, which remembers which steps come in which order, but also the body’s pitching muscles, which also have a memory retaining capability of each muscle should react at each stage of the pitching process.
As with most things we learn in our life, it is learned through repetition, performing the same task, reciting the same poem or singing the same song over and over again, until it’s engrained into us, which allows us to perform without a conscious effort.
Changing from the full wind up to the stretch position denies that full time repetition, which confuses the muscle memory. I am not suggesting a pitcher can not learn both wind-ups, as that is strictly not true.
As I remarked earlier, this is not a rock solid “must do“. I know coaches who feel the simultaneous learning of both wind ups are very important and can present a very impressive argument for their method. --Little League Pitching
One possible issue which may provide incentive to use the stretch position only is I found my pitchers, and most of those I monitored, had better and more consistent control when throwing from the stretch. As this wind-up is simplistic, they seemed to concentrate more on their grip and pitching mechanics than their windup.
Fluid mechanics of pitching. You notice I bolded the word Fluid, as Pitching motions should never be mechanical, like a robot’s movements or herky jerky, with any pauses or unnatural movements. A smooth fluid motion, with every part of every motion having a purpose.
Let’s begin our process of teaching our young pitchers the
Perhaps unexpected, physical aspects of pitching do not come first in the series of pitching elements, but rather the Mental aspect of pitching is the very beginning.
Notice how some major league pitchers work very quickly, getting the ball back from the catcher and nearly immediately go into their wind-up, while others nearly lull you to sleep between pitches, moving as if they barely had enough energy to stand up? Little League Pitching
Pitchers, even very young ones, need to develop a routine between pitches which he does every time, as this routine automatically focuses the mental and physical aspects of preparing to throw the next pitch. The quickness or slowness of the routine normally mimics the pitcher’s personality.
That’s why you’ll see a batter continually stepping out of the batters box between pitches when he’s facing a pitcher who works quickly. It’s to disrupt his mental and physical focus by making him slow down.
The Set-up or Stare is a brief period where a pitcher completely stops and visualizes what type of pitch and where he’s going to throw the pitch, as this helps set his muscle memory into action. He should grip the ball in the glove the exact same way every time, holding not squeezing the ball with the front two fingers, while staring at the catcher’s mitt, visualizing a quarter in the mitt’s pocket, as his target not the entire mitt. This maximizes focus.
Little League Pitching
While standing, legs apart @ 3 feet, the pitcher places the side of his rear foot ( right foot if a righty …left foot if a lefty ) against the pitcher’s rubber. Some may want to bend over slightly, others stand more erect, doesn’t matter.
They begin their focus by staring into the catcher from this position, taking a deep breath move the lead leg back towards your back leg and become set. The distance between the legs at the set position is dependent on what’s comfortable and natural for the pitcher. The lead leg does not have to be in an exaggerated bent position, but never locked straight.
At the same time your bringing your lead leg backwards, you should bring your hands together, chest high a couple of inches away from the chest. Pause and locate the quarter inside the catcher’s mitt. Lift your front leg upward with the knee stopping about chest high.--- Little League Pitching
*** Balance is critical at this stage. A good exercise is to have the pitchers practice holding this position for at least 5 seconds or longer at a time. This will accustom the body to the position and make balancing second nature. ***
---Little League Pitching
As the lead leg goes forward and downward the hands begin to come apart, and the left arm will open and point homeward, the right arm will extend backwards toward second base.
As the lead foot lands on the ground the shoulder and pitching arm should be coming up in a L at @ a right angle to the head. This is when the hips will explode through the zone, twisting and uncoiling like a spring, releasing maximum power for speed and velocity of the pitch.
The lead leg should stride out and extend as far as possible while still remaining comfortable. It should land on an imaginary line that extends from the rear foot to home plate.
If the foot lands too far on the right side of this line, the shoulders won’t be able to fully open and the pitcher will be forced to throw across his body, reducing velocity and putting undue stress on the shoulder.
If the foot lands too far to the left of the line, the shoulders will open too soon which will reduce velocity and control.--Little League Pitching
A good drill to learn proper landing is to have the pitcher take his normal stand next to the pitching rubber. Draw a line in the dirt or chalk a line if on pavement from the rear foot to the plate. Have the pitcher practice his pitching motion paying special attention to where his foot lands in relation to the line.
** The line is not drawn from the middle of the pitching rubber to the plate unless the pitcher normally sets up in the middle of the rubber
Here’s something that might blow your mind. The pitcher does not push off the rubber toward the plate. The rear leg is for balance as the hips move forward, turn and explode through the release zone. The power and velocity comes from the hips in conjunction with arm speed, not the rear leg pushing forward.--Little League Pitching
All pushing off the rubber will do is throw the pitcher off balance wrecking his entire delivery and creating chaos with his control. So next time you hear an opposing coach yelling at his pitcher “to push off and follow through” just smile to yourself.
The rotation of the hips is what lifts and brings the rear foot forward. Should you see your pitcher dragging his rear foot …he is losing power. There is something, minor, that is stopping the hips from fully exploding through the zone, or else his foot would be lifted as it is brought forward, but it needs to be corrected a.s.a.p.
Completely finishing the pitching motion is critical. The ball should be released out in front of the head, and the wrist should snap forward as the ball is released from the hand. The throwing arm should continue across the body ending around the pitcher’s plant knee. --Little League Pitching
*** Repetitive**** It’s important to finish the follow through as the energy exerted flows through and out the arm instead of slamming the brakes on coiled muscles, a good way to incur injuries.--Little League Pitching
How do we give our child or the players on our team an edge in developing their skills? What is the latest technique, gadget or drill that can help them improve their performance?
When searching out resources for improving youth baseball and softball skills we find oodles of drills on YouTube, tons of devices that surely will make the difference. However, often it is the most basic tweak that has the most significant impact on improving performance.
SO SMOOTH! THE COMMON CHARACTERISTIC OF SUCCESSFUL ATHLETES
What would you guess to be the single constant in all successful athletic actions? I am suggesting that control of the head, while likely not the first thing that comes to mind, is an absolute must.
Watch elite athletes and you will see they limit unnecessary head movement. Their bodies are gyrating and moving all over the place doing unbelievable feats, and all the while their still head remains the calm in the center of the storm.
You may have watched an elite athlete move and commented to yourself, “I don’t know what it is, but I can ‘just tell’ that person is a good athlete”. A common characteristic in elite athletes is they move differently that other people. They have exceptional body control; they are ‘smooth’ in their movements. A calm head (in physical terms) plays a significant factor in body movements being smooth and under control.
In order to be smooth and precise in an athletic movement, and precision is a must when attempting to throw a pitch across a 17” plate or squarely hit a round ball with a round bat, a calm head is a factor that must be part of the equation.
Start with a recognition of ‘wherever the head goes, the body will follow’. A slight movement of the head can throw off the rest of the body’s actions.
When swinging a bat, or swinging in any sport (tennis, hockey, etc.), the youth athlete is often thinking of what the result will be following contact. The eagerness to ‘see the result’ takes them away from a focus on the required action needed to get the desired result, making good contact. They pull their head up a moment before contact, their body ‘follows’ just a bit and the chance for good contact is all but lost.
When throwing the ball, or making a throwing action in other sports (javelin, football, etc.), the tendency of the youth athlete is to ‘pull’ with their shoulders and head in an effort to generate power, rather than ‘drive’ with their legs. (Most youth athletes are unaware that most energy and effort in their throwing action comes from their legs.) A slight downward pull of the head throws off trajectory, a slight tug to the side takes the body off-line with the intended target.
Simple fact: when the head moves, the body follows. When the head stays in place, when an athlete has control of their head, keeping their face directed towards the intended target, their body actions and energy stay on the path needed to produce the desired result.
Keeping the ‘Head In Place’ and ‘Facing the Ball at Contact’ increases the chances of the body movements taking the bat to the ball. Keeping the Head Straight and Still, before, during and after a pitch or throw, significantly increases the chances of the ball hitting its target
A common flaw in the throwing or pitching motion is pulling the head to the side opposite the throwing arm. This creates a loss of the forward energy produced by the body, which helps move the arm forward; the arm ‘drags’. The immediate result is reduced power and accuracy.
This arm drag also puts excessive and unnecessary stress on the rotator cuff in the shoulder. As the throwing motion continues, out of synch, stresses can transfer to the elbow as the arm accelerates to and through the release of the throw. This undue stress placed on the shoulder and/or elbow leads to a loss of stamina and strength, while the likelihood of soreness and possibly injury, increases
There is a lot of good instruction information out there, good drills and even some devices that can play a productive role in helping a youth athlete succeed. However, much of these helpful resources are limited in their capacity if our kids have fundamental flaws in their movements. Too much head movement is one of the most common flaws in young athletes.
Correcting this issue starts with awareness. We want to explain to our kids that successful athletes are masters of head control. Then, when we see their head moving excessively, we let them know so they can increase their focus on keeping their head still and focused on their target or the ball. This is true in actions beyond hitting and throwing. Running is another area where excessive head movement impedes an athlete from maximizing their abilities.
The other important factor in developing physical skills is feel. When a player correctly executes an action, we want to give feedback by saying, “Feel That”. Over time, an athlete comes to recognize the difference in the feel of a proper movement versus that of an incorrect movement. When the head is kept still throughout a throw or swing, or while running, it is quite a different feel from when the head is moving.
There are pure technical benefits of positive reinforcement. A player learns to associate feel with the execution of a proper action. Acknowledging a player’s successes is an important component in the teaching process. When a player is recognized for executing a new skill correctly, they are motivated to make the effort to repeat that action. Additionally, they are human. Humans enjoy a little praise every now and then …especially a kid.
Coaching kids is challenging; that is undeniable. They are in the early stages of getting to know how their bodies work and learning techniques to make their bodies work more effectively. Being young and full of energy, they can be easily distracted and may not recognize the importance of repeating good actions when practicing. While we cannot police every movement they make, we can prioritize a few key points that we Do Not let ‘slide’.
My suggestions of actions that are absolute; those we cannot let slide:
Footwork in throwing, catching, and fielding
Maximizing the use of the Legs while batting and pitching
Head control in all actions
These points are critical for success in baseball and softball. Kids will repeatedly fall short in executing these absolutes. It takes a lot of focus and energy on our part to stay on top of these absolutes. It is so easy to just let ‘the little things go’. But if we are truly coaching, we will stay after our kids on these important points. And in doing so, we’ll find that we verbally reference each of these points dozens of times each practice and hundreds time each season.
I’m not one who is big into ‘sayings’, however, one has always stuck with me. I feel this defines the difference between successful coaches and those that struggle. When it comes to reinforcing the core fundamentals of an action or activity:
As coaches and observers of sports, it is not uncommon for the question to come up, “Why are some teams/coaches consistently succeeding, while others are so up and down?” I believe, if we observed their practices, we would see the successful coaches ‘coaching’, and the struggling coaches ’allowing’.
A major misconception of coaching is that those with superior knowledge of the ‘X’s and O’s’ and the brilliant tacticians are the best coaches.
Look around town, watch college and pro games, listen to the analysts on TV. After a while it will become clear that more than knowledge and skill, it is the coaches that demand discipline in their players in drill work (executing correctly every time …or at least giving it their best effort) that achieve the greatest success on game day.
Discipline does not mean yelling and screaming. It is a process of clearly defining, prior to an activity, the one or two key points that are absolute musts on the part of the players. The discipline burden then, mostly falls on the shoulder of the coaches. When it comes to those key points, we make sure they are done correctly every time …and as much as possible let the kids know we saw when they did them right.
Finally, in our roles as mentors to children we are helping to improve physical skills, we must not forget that developing body control and mastering physical movements doesn’t happen instantly. It is a process that requires days, weeks and sometimes months.
Keep in mind that many of the actions in baseball and softball require tremendous overall body strength to perform in a technically sound manner. Most little kids (including many 12-year-olds) simply do not yet have great body strength. Let’s remain patient and provide our athletes with plenty of encouragement while they are developing the skills used in playing this great game!
If your team does something like this routine, please stop. It's time for your pre-game routine to get a make-over.
The goal of a pre-game routine is to prepare your team for the game. Unfortunately, the aforementioned typical routine does not accomplish this goal for three reasons.
Youth baseball coaches probably have their team do this kind of pre-game because they used to do that back when they were playing. Or maybe they remember the pros doing that back in the day. Or perhaps they do it because that's what all the other youth baseball teams do. Whatever the reason, most coaches do that kind of pre-game routine without really asking themselves if this is "misinformation" or if there's a better way.
Here are a few ways to make your pre-game more effective:
This is not an exhaustive list of ways to improve your pre-game routine. The point here is simply to make you re-think your pre-game routine if it sounds like the typical routine I described earlier, and to give you some sample ideas you can either use right away before your next game or to inspire you to come up with your own ideas that will provide game-like reps to your kids.
Balance, rhythm, spatial orientation and the ability to react to both auditory and visual stimulus have all been identified as elements of coordination. In fact, the development of good coordination is a multi-tiered sequence that progress from skills performed with good spatial awareness but without speed, to skills performed at increased speeds and in a constantly changing environment. As Joseph Drabik points out in his book ‘Children & Sports Training’, coordination is best developed between the ages of 7 – 14, with the most crucial period being between 10 – 13 years of age.
As with anything else, an important issue with respect to coordination development is to provide stimulus that is specific (and therefore appropriate) for the individual. Prescribing drills that are either too easy or too difficult for the young athlete will have a less than optimal result.
An interesting note is that there appears to be a cap with respect to coordination development and ability. Younger athletes who learn to master the elements associated with good coordination (balance, rhythm, spatial awareness, reaction etc), are far better off then athletes who are not exposed to this kind of exercise stimulation until advanced ages. The ability to optimally develop coordination ends at around the age of 16. This validates the claim that global, early exposure is the key from an athletic development standpoint. Again, global coordination will serve as the basis to develop specific coordination in the teenage years.
Once again, it is important to mention that coordination development is a process that encompasses years of exposure, and is based on DIVERSITY and VERSATILITY. Young athletes cannot be pigeonholed into sport specific stimulus at a young age and expected to vault into the ranks of elite athletics. As the motto of my company says, ‘You Can’t Become a Champion Until You Become An Athlete.
Furthermore, it is important to understand that coordination-based exercises must be introduced during the preadolescent ages. Adolescence is not an appropriate time during which to begin elements of coordination training. As strength, speed, height and body mass change significantly during these years, it is much more prudent to reinforce already known movements, rather than teach new ones. Herein lies the art and understanding of developing a young athlete. Coaches, trainers and parents must accept the fact that developing a healthy and successful athlete is a journey or process that encompasses several varying degrees of stimulus, all of which build on top of the other.
Coordination training for example, is introduced during the pre-adolescent ages while nervous system plasticity is high (which refers to the nervous systems ability to learn new skills easily) and movement habits have not yet been ingrained as permanent. The scope of coordination training changes during the adolescent ages, during which physical growth alters the young athlete’s previously mastered movement habits. At this time, refinement of movement should take precedent over learning new movement-based skills. In post-adolescence, coordination training can once again be taken to new heights.
One point to consider about coordination is that genetic pre-disposition plays a significant role. Less coordinated children will likely never exhibit the tendencies of naturally coordinated children regardless of training. That is not to say that improvements cannot be made, however – quite the opposite.
Here are three basic principals of coordination training –
1. Start young – coordination improves as a result of learning and mastering new movements. Start young athletes off early with coordination-based exercises that challenge their abilities (within reason). The more coordination a young athlete has, the more ability he or she will display at any perspective sport.
2. Challenge young athletes on an individual and appropriate level – Some youngsters have good balance while others display good rhythm. The key to successful coaching is to undercover what elements of coordination each athlete requires, and develop drills/exercises that most suitably target the weaknesses.
3. Change exercises frequently – young athletes learn quickly in most cases. Be sure to challenge them physically and intellectually with new exercises often.
The following list provides some basic exercises that you can use with your young athletes to help develop elements of coordination –
Remember, coordination includes elements of balance, spatial orientation, rhythm and various other traits. This list reflects exercises to improve several of those elements.
]]>
The first piece of advice would be to avoid drastic changes in a player's hitting style until you know what that player can and can't do. Except for very young players, they're hitting the way they are for a reason. If you change them right away, you won't know why they had adopted the style they had.
For example: I saw a coach who in the first practice noticed that a player was hitting with a very open stance. The player was struggling during batting practice to make contact. The coach believed that a square or slightly closed stance was better. Immediately he changed the player's stance. What he didn't know and didn't take time to find out was the player's dominant eye was his right eye. He had developed an open stance over time in order to be able to see the ball better. Now there are many great players at all levels that hit with an open stance, but for some reason this coach wanted to mold everyone into the stance he believed to be the best. This particular hitter couldn't hit well with that stance and struggled for the early part of the season before he finally abandoned the coach's instructions and went back to an open stance.
So what are the morals of the story? Here are a few.
Why would a player like that stance? Not sure, ask him.
Many times coaches feel like they have to have the answer immediately. When a player struggles, the coach may feel the need to correct the problem. It can't always be done; actually, it almost never can be done as quickly as the coach would like. Analyze the problem. Assume that what you perceive as the problem isn't the problem. What else is the player doing that could cause the problem? In the example above, the player may not have been tracking the ball, may have been too far away from the plate, may have been just too rusty.
This is a good time to talk about video taping your hitters. If you don't videotape your hitters, you're missing out on one of the best ways to figure out how to turn them into good hitters. Tape hitters, analyze the tapes, and then review the tape with the player. Often players can't feel that they are doing something wrong. You may tell them that they are dropping their hands below the waist before the swing, but they won't feel it. Videotapes don't lie. You can show them exactly what their swing looks like and come up with some drills to make modifications.
Before you get worried that you have to come up with different strategies for each hitter, there is some good news. There are certain fundamentals that are shared by good hitters. A coach often falls into the trap of being too concerned with what a hitter is doing before the ball is even pitched and not enough attention to what the hitter is doing after the ball is released from the pitchers hand.
When you learn the fundamentals that are shared by good hitters, you'll be able to take that videotape of your hitters and make very small changes necessary to turn a hitter around. Don't try to change everything at once. Make small adjustments and have the player practice that new skill until it's natural. Then move on.
Many coaches only focus on the physical side of hitting. While that's important, it's just as important to develop the mental side of a hitter. Hitters have to go up to the plate knowing they can be successful. It's the coaches job to try instill that positive attitude in the player. Work with a player on having a positive thought process from the time they step into the batter's box until they are running to the base. They need to think up at the plate and focus on each pitch believing this will be the pitch. That thought process won't come naturally for most players, you'll need to work to instill it.
In the next few pages, we'll cover the fundamentals of good hitting. Often we'll give a variety of different methods. Hopefully this will provide you with the necessary information to help you help your players.
]]>Baseball? Hmmmmmm.....yes, there are bases, and the players are hitting the ball with a bat, but really, Tee-Ball is a bunch of kids in the park playing a different version of tag.
Sports, especially baseball, are very different when played by 4-6 year olds. The soccer folks have figured this out; baseball has been slow to figure this out. When was the last time we saw a youth soccer game comprised of 4-6 year olds that had two sides of eleven playing against each other? No, they are playing 4 against four on an itty-bitty field. Many youth baseball organizations continue to have teams of 12-14 kids, with all of them playing in the field together.
How much action are those six outfielders having? What is the experience like for this young of a human when asked to sit still for 5-10 minutes waiting for a dozen teammates take their turn to bat? We are fighting human nature to ask a 4-6 year old to sit and watch other kids play, but not be allowed to join in.
What is the logic in mimicking the game played by mature teens and adults and having teams of a dozen or more players and stashing half the team in the outfield where few balls are hit (at least early in the season)?
Let’s give the idea of making Tee-Ball a game of 6 v 6 a chance; played with kids at the four infield positions, pitcher and catcher. l.
These over-sized rosters create additional problems on the offensive side of the game. When we watch the game played at higher levels the players sit patiently on the bench waiting for their turn to bat. We take the game to the Tee-Ball level with delusional thoughts that our little tykes can do the same. Rosters of ten, twelve or more makes the players endure what is an agonizingly long wait, for a very young child, to get a chance to bat.
Let’s re-evaluate our antiquated approach to how Tee-Ball is structured. Could it be that the current structure has resulted in a significant number of players leaving the game, out of boredom, long before they had an opportunity to learn what baseball is all about? Have we been losing the opportunity to fill more rosters at the higher levels within our leagues as a result of how the Tee-Ball level is currently operated?
Cut Back the Number of Kids on a Team
Tee-Ball with six kids on a side makes a lot of sense. Teams can be organized with seven on a roster, figuring that on many days we will lose one player to the sniffles, etc. On days where all seven show up, the extra player can be placed in center field (which is about 10 feet behind second base). The extra player, in this scenario, would only get stuck in the outfield one time per game, assuming we rotate defensive positions each inning.
Almost all the game action is in the infield. When a ball does make it to the outfield, our little infielders are more than eager to run after it. These little bundles of energy are dying to run around. Chasing the ball into the outfield is a major bonus for them.
With fewer kids on the field, each player has a legitimate opportunity to participate in each play. It also makes it easier for each to learn and gain a basic understanding of the game when each is playing an actual position, rather than standing among a mass of bodies. Having a bunch of kids spread out in ultra-shallow outfield depth waiting to accost the infielders each time the ball is put into play is not an environment for learning.
More Reps and Limited ‘Dugout’ Chaos
When we make the change to six against six Tee-Ball, the kids learn more, have more fun and a higher percentage will return to play again next year. The league administrators I have talked to over the years name increased retention as a top priority, if not the #1 goal, for their league. Let’s look at a few ideas that can improve the Tee-Ball experience for the players (and the adults too).
1 - Start each inning with runners on first and second base. Why not? This is not pro baseball; it’s not high school baseball; in fact it doesn’t closely resemble the game our 11-12 year olds play. With two kids on base and a third player batting we are left with only three little monsters to manage in the ‘dugout’. In addition to limiting the number of kids in the dugout, by starting each inning with two players on base we are getting more kids involved in the game. Those on the bases are gaining valuable game experience.
2 - Kids love to hit the ball and run. By cutting in half the number of kids on a team, we double the number of times each player gets to bat each game. More chances to bat means more fun, excitement and anticipation on the part of the players. Double batting opportunities increase skill development. Greater skill development improves the experience and increases the desire to return and play baseball the following year.
3 - Fewer kids on defense allows each player to handle the ball more often. Confusion is decreased by eliminated unneeded bodies running around creating chaos. In this new environment the opportunity for the kids to gain a better understanding of the game increases exponentially.
The Batter
Swing the bat with the legs - The power in a batting swing comes almost entirely from the legs. Most children only use their arms to swing the bat. his is the most important skill to teach in Tee-Ball. This article explains teaching kids to use their legs to power their batting swing. The article is for kids a few years older than Tee-Ballers. Utilize the technical and teaching points; leave out references to a 'batting workout', 'checkpoints' etc. That stuff is over the heads, attention span and interest of Tee-Ball age players.
Distance the Batter Stands from the Ball on the Tee We want the batter to stand one bat length away from the tee stem. Extend a bat from the tee stem to the batter’s hip (while they stand straight and tall). .
Batter’s Box Design*** Make a perpendicular line on the ground across the batter’s boxes. Use grass paint, line chalk, or anything you can come up with to make this line. Set the batting tee so the stem is lined up directly over the top of the line. Each batter places their front foot on the line when getting into their stance. This creates the ideal relationship between their body and the ball at contact. Note the relationship between the ball and the front foot in the pictures. Contact is generally made when the ball is even with the front foot, give or take a few inches. (Also not that each is turning their legs to swing the bat.)
Incorporate (I will suggest mandate) the practice of utilizing this line across the batter’s box in all practices and games across your Tee-Ball program. This simple practice will make a greater impact on the quality of PLAY in your at the Tee-Ball level than any other single factor.
Positioning and Alignment of the Feet The batter’s feet, at this stage of development, should be parallel with home plate. Help the batter position their feet properly. Point out to them that we want to be able to draw a straight line from the toes of their back foot to the toes of their front foot and have that line go straight out to the pitcher. The feet need to be slightly outside than the width of the shoulders (not just ‘shoulder width apart’).
Tell your Tee-Ball players to stand with their feet ‘wider than your knees’. When they look down at their knees they should not see their feet directly below their knees. Note: you will notice that most every child will prefer to stand with their feet close together. This is because, at this stage of physical development, the legs don’t have the strength to comfortably stand with the feet wider apart. The kids can develop a level of comfort standing this way, but it will require you to remind them (literally) over and over every day throughout the season. It is important to stick to this constant instruction. When the feet are wider apart, a batter is more balanced and is better able to utilize their leg strength, which is a critical factor in an effective swing.
These final points, along with standing the appropriate distance from the tee stem (#1) and correct positioning of the front foot (#2), will give our little sluggers the best possible chance for success. Increased success on the part of the batter equates to more activity and participation for the kids on defense.
Hand Position and Grip Hands should be held even with, or slightly above, shoulder level. Both elbows need to be bent to some degree. We want the top hand/wrist and bat to create a 90 degree angle. This will put the barrel of the bat over the back shoulder producing the ‘classic’ bat position in the stance. The bend in the elbows and wrist set the batter up to maximize their strength and whipping action when swinging. Note: kids who do not maintain the bend in the elbows and wrist as described are usually dealing with a strength issue and likely need a shorter bat.
Grip: Right handed batters have their right hand on top when holding the bat; left handed batters have left hand on top. The hands need to be together; no gap between the hands. As long as kids are relatively close to the prescribed grip and hand position, just let them work with hand position they come up with.I will address batting and the swing in a lot of detail as we move through the fall and winter.
But We Can’t Find Enough Coaches
Who coaches Tee-Ball? Answer: regular parents from our neighborhood. It is understood that not every parent can run a team because of conflicts with work and other prior commitments. It is understood that there are some parents who have little interest in being involved beyond dropping their kids off and picking them up. It is understood that some parents have multiple siblings and are juggling schedules. However, there are parents who do have the time available to run a team. And it should be clearly communicated to the other six sets of parents that they are invited, wanted and needed to participate in as many practices and games as possible.
It is important to work towards the creation of a mindset and culture at the Tee-Ball level that we are all coaches. Ideally, each player has a parent participating in each practice resulting in a 1:1 adult to player ratio. (Before Tee-ball practices begin in 2014, the Baseball Positive Website will provide just the right amount of information to help any parent be an effective coach or helper parent for their child’s Tee-Ball team.) We can establish rosters of seven per team and find a coach for each; the soccer folks have shown us it can be done.
Tee-Ball players are the future of every league. Putting in the time and energy to create a Tee-Ball program where every player has a great experience is an investment that will strengthen every league, and the game as a whole, in years to come. The path to the greatest success for Tee-Ball is playing the game with six players to a side.
Assign An Experienced Board Member as Tee-Ball Director
Recap of Key Points
Create teams of seven players
Eliminate the outfield positions on defense
Structure the batting environment for optimal success
Make the Tee-Ball program a top priority of each league
Every Tee-Ball parent is a coach
Methods: A total of 82 youth baseball coaches in surrounding suburban areas outside 2 separate Midwestern metropolitan cities were asked to answer an anonymous 13-question survey. Survey questions solicited demographic information of youth athletes coached, while assessing for incidence, knowledge of, and compliance with established recommendations on pitch count limits and upper extremity overuse injuries in youth pitchers.
Results: In total, 61 of 82 (74%) coaches returned surveys. The majority of coaches reported coaching male athletes (89%, n=54) primarily between the ages of 11 to 12 years (51%, n=31). A total of 56% (n=34) of coaches reported "always" keeping track of pitch counts; however, 92% (n=56) reporting not keeping track of pitches based on established recommendations by the American Sports Medicine Institute, whereas 56% were noncompliant with age appropriate pitch count recommendations as established by the 2006 US Baseball Medical and Safety Advisory Committee. Only 13% (n=8) of coaches were able to correctly identify risk factors for overuse injuries while acknowledging the necessity of off-season strengthening. Thirty-eight percent (n=23) of coaches reported sitting out an athlete because of overuse injury, with the highest rates found in those coaching the youngest (≤8 and younger) and oldest (≥17 and older) age groups. Meanwhile, 15% (n=9) of coaches were noncompliant with age-based recommendations against throwing breaking pitches.
Conclusions: Knowledge regarding pitch count guidelines established to prevent overuse injuries to the shoulder and elbow in youth pitchers remains deficient in the cohort of coaches surveyed. One great way to build, develop and safely is do what i call "Dry Work" Its a series of additional drill that develop the arm without overuse. The Performance Pitch is a great dry run aid to develop young arms.
Performance Pitch Training Tool - Maximum Velocity Sports - USA
]]>
Pitching is a pretty high risk/high reward pursuit. When things are going right, there’s nothing better… but as any pitcher who’s ever been injured can tell you, it doesn’t take much for that to all come to a screeching halt.
A lot of factors come into play here, but one thing you can do to give yourself the best shot at staying healthy performing your best is improving how well you recover between games.
This means addressing the entire body – not just your arm – and really every part of the process – before, during and after you pitch.
Conventional approaches like running and icing are fine (click here for more on why distance running might not be the best idea), but if that’s all you do, you’re missing out on some things that can really help you get back to full strength more quickly. So here are 3 simple tips for improving your recovery process.
What you do before you throw can have a big impact on how well you recover after you throw… There’s a great expression I use all the time with my guys: “Warm up to throw, don’t throw to warm up.” Too often, I’ve seen youth baseball games where the players just show up, grab their gloves and start throwing… this is basically how they “get loose.” No good… here are some tips for improving your warm-up.
Pre-Warmup Soft Tissue work (foam roller, etc): Soft tissue work like foam rolling can be great prep work and has been shown to aid in recovery. Joe Hashey with Synergy Athletics gives a nice foam roller demo in this video:
Dynamic Warm-Up: Go through a dynamic warm-up with an emphasis on mobility and good movement patterns… this doesn’t need to take forever, but a good rule of thumb is you want to at least warm up to the point of light perspiration.
In the Ballistic Pitching Blueprint, I provide a complete Dynamic Warm-Up you can do anywhere in just 5 minutes. We follow that with a light performance bands routine to continue the warm-up and activate all the muscles in and around the throwing arm.
This should be fairly obvious, but one of the best ways to avoid becoming overly sore after you pitch is limiting your pitches (ASMI and Little League have put out recommended guidelines, and these are certainly a good place to start). This responsibility generally falls on the coaches (they’re the ones deciding who pitches and who doesn’t, after all).
But if you’re serious about your future in pitching, you owe it to yourself to take ownership of this process. Have someone you trust, whether a parent, friend or teammate, keep track of your pitches.
When I was in the Indians organization, if you threw more than 30 pitches in an inning you were done – you weren’t going back out there next inning. So if you were a starter, and you maxed with 30+ pitches in the 1st inning, you headed to the bullpen and got the rest of your work in down there – in a controlled environment – to get to your desired pitch count.
Now there’s something to be said for letting young pitchers get out of jams, and not babying them… but there’s also being smart when it comes to understanding the risk factors that increase the chance of injury. Plus knowing we had that 30 pitches/inning limit was pretty good incentive to stay focused on attacking the strike zone and being economical with your pitches.
As I’ve discussed before, the #1 risk factor for youth pitching injuries is pitching with fatigue. One way to minimize fatigue is making sure you’re properly conditioned to pitch. But often times, fatigue stems from overuse… or as Mike Reinold points out in this recent article, flat-out abuse:
Are We Putting Our Kids at Risk for Youth Baseball Injuries?
What you do immediately after you throw can also have a meaningful impact on how well you recover. Here are some simple suggestions for maximizing your post-throwing routine.
Light Cardio: Nice and easy, just working on increasing bloodflow and getting some good deep breathing to increase oxygen intake. The idea here is to circulate the blood and deliver nutrients where they’re needed. In the minors, they used to put us on a stationary bike in the training room, but a light 5 minute jog works just fine, too.
Mobility Exercises: Another option I really like is just going through a full Dynamic Warmup routine after you throw. You engage your whole body, get the arms, legs and core working, and get bloodflow to the areas it’s needed most.
Post-Throwing Stretching: Key here is understanding what you’re trying to accomplish… the goal is maintaining range of motion by addressing areas that get tight after pitching. So don’t go stretching things that are already loose – for example, stretching for more external rotation after you pitch is pretty counter-productive.
Pitchers tend to lose internal rotation from pitching, so the Sleeper Stretch can be an effective way to maintain or regain any lost range of motion.
Eric Cressey also offers a free “Post-Throwing Stretching Series” on his site – just scroll down to the bottom for the download (there’s a ton of great content there, too).
Icing: This has become a little controversial (some guys avoid it, others swear by it), but the bottom line for me is that icing can help reduce inflammation – for many, icing may not be necessary, but I personally always felt better when I iced. Perhaps I’ll dig more into the debate in a future piece, but basically, inflammation is bad for recovery… icing prevents inflammation when done appropriately.
Some tips when icing:
1. Use a large bag with a lot of ice (crushed ice is best)
2. Avoid placing ice directly on the ulnar nerve (funny bone) – you can line with a towel to prevent freezing
3. 10-15 minutes on, 20 minutes off is a good rule of thumb (repeat as desired). Leaving ice on longer than that can be counter-productive.
*Special Note: since writing this post, more and more evidence continues to point towards icing being unnecessary in many cases (or even potentially counterproductive to the recovery process). If there’s any step in this “post-pitching routine” I’d be okay skipping, it would be icing. Here’s a good post from Josh Heenan that goes into more detail: Should You Use Ice, Aleve, or Ibuprofen After You Throw?
Refuel Better! This is pretty common sense stuff, but when pitching you’re exerting a lot of energy – short bursts of power, again and again. This takes a toll on your muscles and tendons. And just like with weight training or any other high performance activity, what you put in your body immediately afterwards can have a big impact on your recovery.
Some common sense tips for refueling after you pitch:
1. Get some carbs and protein within 30-40 minutes: Have a high carbohydrates meal (restores glycogen), followed by a high protein source (aids in the rebuilding & recovery process). An energy bar and protein shake are a pretty good combo.
2. Hydrate: Drink a lot of water… water’s a pretty amazing thing, plus its FREE so there’s really no excuse for skipping this step.
And lastly…. Get plenty of sleep!
]]>Ask players and coaches about the importance of a good mental approach, and most will agree it plays a huge role in a player’s success. In sports, when guys are really confident and performing at their best, we talk about them being “in the zone,” and you hear all the time about hitters being “locked in” or pitchers being “in a groove.”
But despite this wide agreement, most players and coaches spend all of their time (or at least the vast majority) focusing on training the physical side of the game.
Now don’t get me wrong, I don’t want to downplay the physical side – you can have all the confidence in the world, but if you don’t have the strength and skill to execute a pitch with power and precision it won’t do you any good.
But what I notice a lot when it comes to pitching (and sports in general) is people tend to think of confidence and a winning mindset as something innate – you either have it or you don’t – rather than something that can be worked on and improved.
When a guy has confidence, believes in himself, and is able to stay calm under pressure, they’re considered “mentally tough”. When a guy falls apart in pressure situations, he’s a mental weakling. This outlook is pervasive in sports, and it couldn’t be more wrong. In my opinion, not only is a strong, positive mental approach important, it’s something that’s fully within the player’s control and, just like other areas of his game, can be improved with practice.
The problem is most players and coaches don’t know where to begin. They may understand the importance of a good mental approach, but for the most part the workings of the mind remain a total mystery. So here’s my advice to people in this camp:
And for me that starts with self-talk. How you TALK to yourself on the mound can have a huge impact on your mental state, your focus, and your performance. When I refer to “self-talk” I really mean your inner dialogue. It’s fine to talk out loud, too, if that helps.
Keep it POSITIVE:
Your subconscious mind doesn’t differentiate between “do” and “don’t.” So stay away from saying things like “don’t walk this guy.” All your brain hears is “walk this guy.” Instead give yourself a clear, positive directive. “Good low strike right here!” is a good example.
Focus on what you can CONTROL:
Remember, as a pitcher, you are in control. You’re the one with the ball, you initiate the action. However, once the ball leaves your hand the result is largely out of your control. You might make a great pitch, get a ground ball, but then your short stop boots it. Or the umpire blows a call, or it takes a bad hop.
The problem arises when you place so much emphasis on the result (out of your control) that it negatively affects your approach on the next pitch. This can lead to a vicious cycle where things quickly spiral out of control. Worrying about all those other things going on around you isn’t going to help you make good pitches. So nip it in the bud and get back to focusing on what you can control (your approach and making a good pitch).
Remember this acronym – W.I.N. (What’s Important Now?):
For you as a pitcher, the answer is always the same: the next pitch. The next time you start feeling frustrated or that things are going against you, step off the mound, remember W.I.N. and get your focus back where it needs to be: your next pitch.
Have CONVICTION:
The wrong pitch executed well is better than the right pitch thrown with doubt or in a half-hearted manner. So quit trying to out-think the hitter.
There’s a great line in Bull Durham where Crash Davis tells Nuke LaLoosh, “Don’t think. It can only hurt the ballclub.” It’s funny, but there’s some truth to it. There’s nothing wrong with being a smart pitcher. But once you commit to making a pitch, you have to shut your mind off, get out of your own way, and execute the pitch.
LET GO of negative emotions:
It’s okay to be upset if you give up a big hit or walk a batter in a key situation. That’s normal, you’re not a robot after all. The key is not to let that frustration spill over to your approach on the next pitch. Step off the mound, kick a little dirt, take a deep relaxing breath, whatever it takes to help you let go. Once you toe the rubber, you need your mind clear and focused.
Have a MANTRA: I don’t view this as a necessity, but having an expression you can repeat to yourself during a game can be a big help. Greg Maddux, considered one of the smartest pitchers of his era, said when asked of strategy, “I just focus on making good pitches.”
For Kevin Costner’s character in For Love of the Game his mantra was “clear the mechanism.” A little technical and wordy for my liking… but hey, whatever gets YOU locked in.
A simple mantra (something as simple as “EXECUTE”) can really help you focus on the task at hand.
This is just a sample of some of the simple steps for pitching with a better mental approach. In PART II we’ll dive into some specific ways you can actually Train Your Brain (like a muscle) to have better focus and clarity out there on the mound.
]]>When watching a Major League game I'm often amazed at the number of times I see a lack of fundamentals when it comes to playing the outfield. In the World Series between the Giants and Angels a runner scored on a shallow fly ball to right field simply due to the outfielder playing the ball so poorly. It wasn't a difficult catch, there wasn't any sun in his eyes. He simply drifted on the ball and was backing up as he caught it. The runner recognized the opportunity and scored on a play he normally wouldn't have had a chance on. This is just one example of many that can be seen daily in Major League games. I really don't understand why Major League Managers put up with poor play in the outfield. They would never stand for it from their infielders. This is not to say that there aren't some amazing defensive outfielders in the game, but more to point out that the expectations of defensive performance in the outfield seems to be lower.
You may agree or disagree, but either way you're probably wondering what my opinion on this subject has to do with coaching youth baseball? It has to do with the value and priority you as a coach place on building a strong defensive outfield. If defensive play at the pro level seems to be held to a lower standard than other positions, do you think it's not at the youth level also? Many coaches want to hide players in the outfield and hope that they don't see much action. I'm not saying a coach should move his/her best players to left or right field, but I would suggest that by teaching outfield skills and raising the expectations, you can see significant improvement in the defensive ability of your outfield. As a coach you need to realize that outfield play can be improved drastically by implementing a system that emphasizes the importance of outfield play to the success of each play during a game.
Due to the fact that outfielders often see less action than other players, it can be difficult for a player to stay mentally focused on the game. I'm sure we've all seen a ball being hit into the outfield and the player not being "in the game". While it's an embarrassing situation, it's also easy to understand. As coaches, we need to try and redefine for our players the definition of "action". Most players will consider action to be an opportunity to make a play with the ball. You need to try and relate to your players that action really is the act of being in the proper position to make a play. It requires hustle and paying attention to the game and can be achieved on each and every play during a game, whether the player touches the ball or not. If your players buy this definition of action, you will be much closer to having an outfield that is ready on each and every play during a game.
Definition is one thing, results are another. As a coach how can I keep my outfielders focused? In the section Outfield Approach, a pitch by pitch preparation from a player standpoint is discussed. While this will help to keep an outfielder focused, it is really secondary to you defining the role of the outfielder and the expectations that go along with it. Each player on the field has a role on each and every play during a game and that includes the outfielders.
Here's an example that you will see over and over again in youth leagues. An overthrow is made at a base. The ball rolls into the outfield where the outfielders were simply standing in their positions, the runner takes an extra base, maybe two. The coach yells out to the outfielders, "Why weren't you backing up?" The players simply shrug their shoulders and go back to their positions. They have no answer. It may have been discussed at practice, but they hadn't been backing up all game and the coach didn't say a word. How were they supposed to know there was going to be an overthrow?
Even though the coach may have talked about the importance of backing up during practice; by not mentioning it during the times when it didn't result on a chance to get the ball, he/she undermined the importance. In the section Backing Up the subject of where to be on each play is discussed in more detail. For now, the important thing to emphasize to your outfielders, is the value they provide to the team when they stay in the game on each and every play. Simply telling them won't be enough. You must provide positive feedback during practices and games when players hustle to the proper spot.
The remainder of the Outfield section discusses the skills necessary to become a good outfielder. Too often the skills are developed, but the kids still fail to perform the skill because they're simply not focusing during the game. Outfield Approach and Backing Up will give you some strategies to help keep your outfielders "in the game".
]]>Good defense revolves around a teams ability to throw accurately and catch the baseball. Watch any high school level team or below warm up in the outfield and you'll see players using poor throwing mechanics and running after poorly thrown balls. If playing catch is such a core skill for defense, why aren't players better at it? One of the primary reasons is that many coaches don't teach their players how to throw.
Think your players know how to play catch? That's the assumption of many coaches. In the past when kids were out playing ball in the backyard all the time, kids were more skilled at playing catch. You may have a couple of kids that do that on a regular basis, but if you're like me you have a number of kids that don't touch a baseball between practices. My own two boys are a perfect example as video games and TV normally win out over going outside and playing catch, especially during baseball season when the weather isn't usually the greatest. They'll go out if I go out and play with them, but the hours I used to spend throwing a tennis ball against the house for entertainment has been replaced for them by TV and video games. The result for most coaches is that players are often lacking fundamental skills that many of us expect them to have.
I hear coaches at all levels complain that they get kids on their teams that don't have the skills necessary to be at that level. Often the blame is placed on the previous coaches for not teaching the fundamentals. While this may be the case, the blame should also be placed on the kids lack of practice at home.
So how should you deal with it?
First, realize it's just something you'll have to deal with each year. You can complain about it and try to hide those kids in positions where they will do the least amount of damage. That would one approach. It's an approach that many coaches take even though they don't realize it. Another approach would be to emphasize the importance of those basic skills and work hard at improving those skills right away. Playing catch is one skill all players can improve on and is essential to the success of your team.
Second, realize that kids will practice at home if you give them specific fun drills to work on in between practices. For younger kids, I try and give them a task where they can count the number of times that they can do a certain skill. I'll send a piece of paper home with each player where they can record their best Since, the goal is to develop a love for the game, make sure the homework is fun.
I'll never forget my first day of fall practice in college. Our coach had us all stretch in the outfield and then before he allowed anyone to touch a ball, he brought us all together and went over throwing fundamentals. It was surprising since I had been throwing all my life and like most of the other guys on the team, I thought I was pretty good at it. I think the real surprise was that I couldn't recall any other coach teaching me how to throw. My throwing accuracy and arm strength increased dramatically that year as a result of practicing how to properly throw the ball.
Every throw needs to be with a purpose. In fact while the kids ages 10 and up are warming up, have on standing on the foul line and have the other steadily scooting back every few throws and distance depends on ages. Every time a kid overthrows his warm up partner, he shall retrieve the over throw and the player whom was over thrown switches places and goes to the foul line. Basically if you over throw you partner you go get the ball and switch places.
THROW WITH PURPOSE AND INTENT!!!!!
Chuckie Platt
]]>Unless the ball is absolutely ripped at you and you don't have time, get in the habit of moving toward the grounder as you prepare to field it. Notice the word 'charge' wasn't used -- that word implies running towards it as fast as you can. Unless it's a slow roller, you want to approach the ball in a controlled manner that is aggressive but not out of control. This allows you to make adjustments so you're not catching it off a short hop or taking it off the first bounce on the infield dirt. As you get closer to the ball, begin breaking down to get into position to field the ball. To do this, shorten your steps and widen your feet. Bend not only at the knees but also with your back. Put your hands out in front of your body and open your glove toward the ball with your bare hand on top.
There are a few common problems that players make when catching a ground ball.
In all situations, try to avoid catching the ball on a short hop. In the diagram below, the approximate area of the short hop is shown in red. Catching the ball on a short hop is a difficult play to make. It takes practice for players to get in good position to avoid fielding a short hop. The following link is a good drill for players to work on the necessary footwork for avoiding a short hop
The backhand play is one of the most difficult to make. Poor technique and lack of practice are two of the biggest reasons why players struggle with the backhand play.
As you approach the ball you will either field it with your left foot forward or right foot forward depending on when you get to it. Many players will practice fielding a backhand only one way, but the fact is you will have to make the play both ways so make sure you practice both ways of fielding a backhand. Either way you want to make sure you keep your glove in front of your face. You want to watch the ball all the way into the glove.
]]>
When you have finished delivering the pitch your follow through should put you in a good position to field the ball. Have your hands out in front of you and ready.
If there are no runners on base, catch the ball and take a few steps to get off the mound. This will save you from the embarrassment of catching your cleats in the divots that are naturally made on the mound. Once you have done this, set yourself and make a good throw to first.
The same will apply with runners on base but you are still making the play at first. If you are going to throw the ball to second, third, or home, you won't have the time to take the extra steps. Just be careful to lift your feet when you make your throwing motion.
You will be required to field bunts on both the third base side and first base side depending on the situation. When a good bunt is laid down, don't worry about trying to get the lead runner, simply focus on trying to get an out at first. Concentrate on fielding the ball first and then throwing.
You must cover first base on all ground balls hit to the first baseman. You should also cover first on ground balls to second when the first baseman has to leave his position. When covering first, you don't want to run in a straight line to first base. It is very difficult to run with your back to the play, turn quickly at first and catch the ball. So, when covering first, run towards the first base line about 20 feet from first base. As you get close to the line you want to round off the corner and start heading toward first. This will put you in position to see the play and make the catch on the run if necessary.
Don't be a spectator with a runner on third base. You must be ready to cover home plate on all passed balls and wild pitches. The catcher is going to bust his butt to get to that ball as quickly as possible to save a run, do your part by running quickly in to cover home.
Overthrows will happen from the outfield and cutoff men on plays to both third and home. Expect an overthrow by backing up third and home on any throws from the outfield to those bases.
As a pitcher these will help keep runners from scoring or advancing which is thr name of the game.
Chuckie Platt
]]>Helps pitcher develop a good bend in the front knee.
A common mistakes made by hitters is having the stride be part of the swing. What I mean by that is that for many hitters when they begin their stride, they have committed their timing at that point and once the stride foot hits, they swing the bat. This makes it very difficult to adjust to the different types of pitches you're going to face.
Striding while keeping your weight back allows you to hold that position and adjust for the different speeds and locations of the pitch. That ability to hold that position for a split second without having your weight continue forward is critical in being able to adjust to different pitch speeds and locations while keeping bat speed and power.
Stride length: A common trend in the major leagues is to have very little stride. As more players use a more rotational swing, they realize that a long stride is counterproductive when it comes to having a compact swing. Let's think about what we want to happen in the stride. We want our weight to stay back and have just a little come forward with the stride in order to maintain good balance. We want to make sure that our timing is perfect and our front foot touches down in time and we're ready to swing at that point. We want to keep our head as still as possible in order to make it easy to track the ball. All of these items that we want to accomplish are made more difficult by having a long stride. If you have a long stride, more than 4 or 5 inches (less if you aren't fully grown), this is the time to correct it.
Overstriding can be caused by two things.
1. Your feet are too close together in the stance. If your feet are shoulder width apart or less, simply adjust your stance a little wider and step to the same spot you did before.
2. Your stance is fine, but you think a big stride will help you get more weight behind the ball and help you hit it harder. In fact, the large stride is causing you a loss of timing and a loss of power.
In both cases you have developed a habit of striding too far and overstriding can be a difficult habit to break. It takes time and repetition to build the new habit of striding correctly and having the proper length.
How to correct overstriding: Although the habit can be difficult to break, the correction for overstriding is rather simple. Whenever you are swinging a bat, place either another bat, piece of wood, or something else in front of your stride foot between 4 to 6 inches away when you get in your stance. As you take your stride and your swing, you then want to make sure your foot lands behind the object you placed. Over time this will build the new habit of striding the proper distance. You cannot correct this problem in a day or two. Keep placing that object in front of your foot until you no longer have to think about it even being there.
When I work with young hitters I find that most of them don't realize the importance of the coil and the stride in relation to timing the pitch. Too often the player thinks that the stride should be made after they have determined that they need to swing, or they take their stride without adjusting to the different speed of a particular pitcher. The start of the coil must be adjusted slightly to the speed of each pitcher. We don't want to rush those movements or we will negatively affect our swing.
Starting your coil at the right time and having that movement and the stride be smooth and consistent are important factors in being able to correctly time the pitcher. This should be done from the on deck circle before every at bat so you know when to begin your stride to be ready for that pitchers best fastball.
Get in your stance and take a few strides and swings. Have a parent place a stick or something else at the front of the stride foot. Then take your stride and stop and have a parent place another stick or something at the front of the stride foot. Now measure the distance of your stride. If your stride is too long you'll want to work on correcting this using the method above before you start working through the other aspects of this lesson. You need to practice your stride by taking it with the correct length!
Once you have the correct length, work on taking your stride and pay close attention to keeping your weight back and having the majority of your weight on the inside of your back leg.
Finally, check the position of your bat when you've completed your stride. It should be at a good angle and slightly off your back shoulder. You need to be ready to swing at this time, so your bat needs to be in the correct position. Have a parent watch your stride and let you know where your hands are when your front foot touches down. If your hands aren't slightly off the back shoulder at that time then you most likely have developed a hitch and you'll need to correct that problem.
]]>